


TheHive is a powerful open-source platform designed for incident response and security operations. It provides a comprehensive suite of tools to help organizations manage and respond to security incidents effectively. This guide will explore TheHive’s features, benefits, usage, and its role in preventing security incidents.

Overview of TheHive
TheHive is an open-source Security Incident Response Platform (SIRP) that integrates with various security tools to streamline the incident management process. It offers a collaborative environment for security teams to analyze, track, and resolve incidents efficiently.
Key Features
- Case Management: TheHive allows users to create and manage cases with detailed information, including tasks, observables, and logs.
- Collaboration: Multiple users can work on the same case simultaneously, promoting teamwork and efficient incident handling.
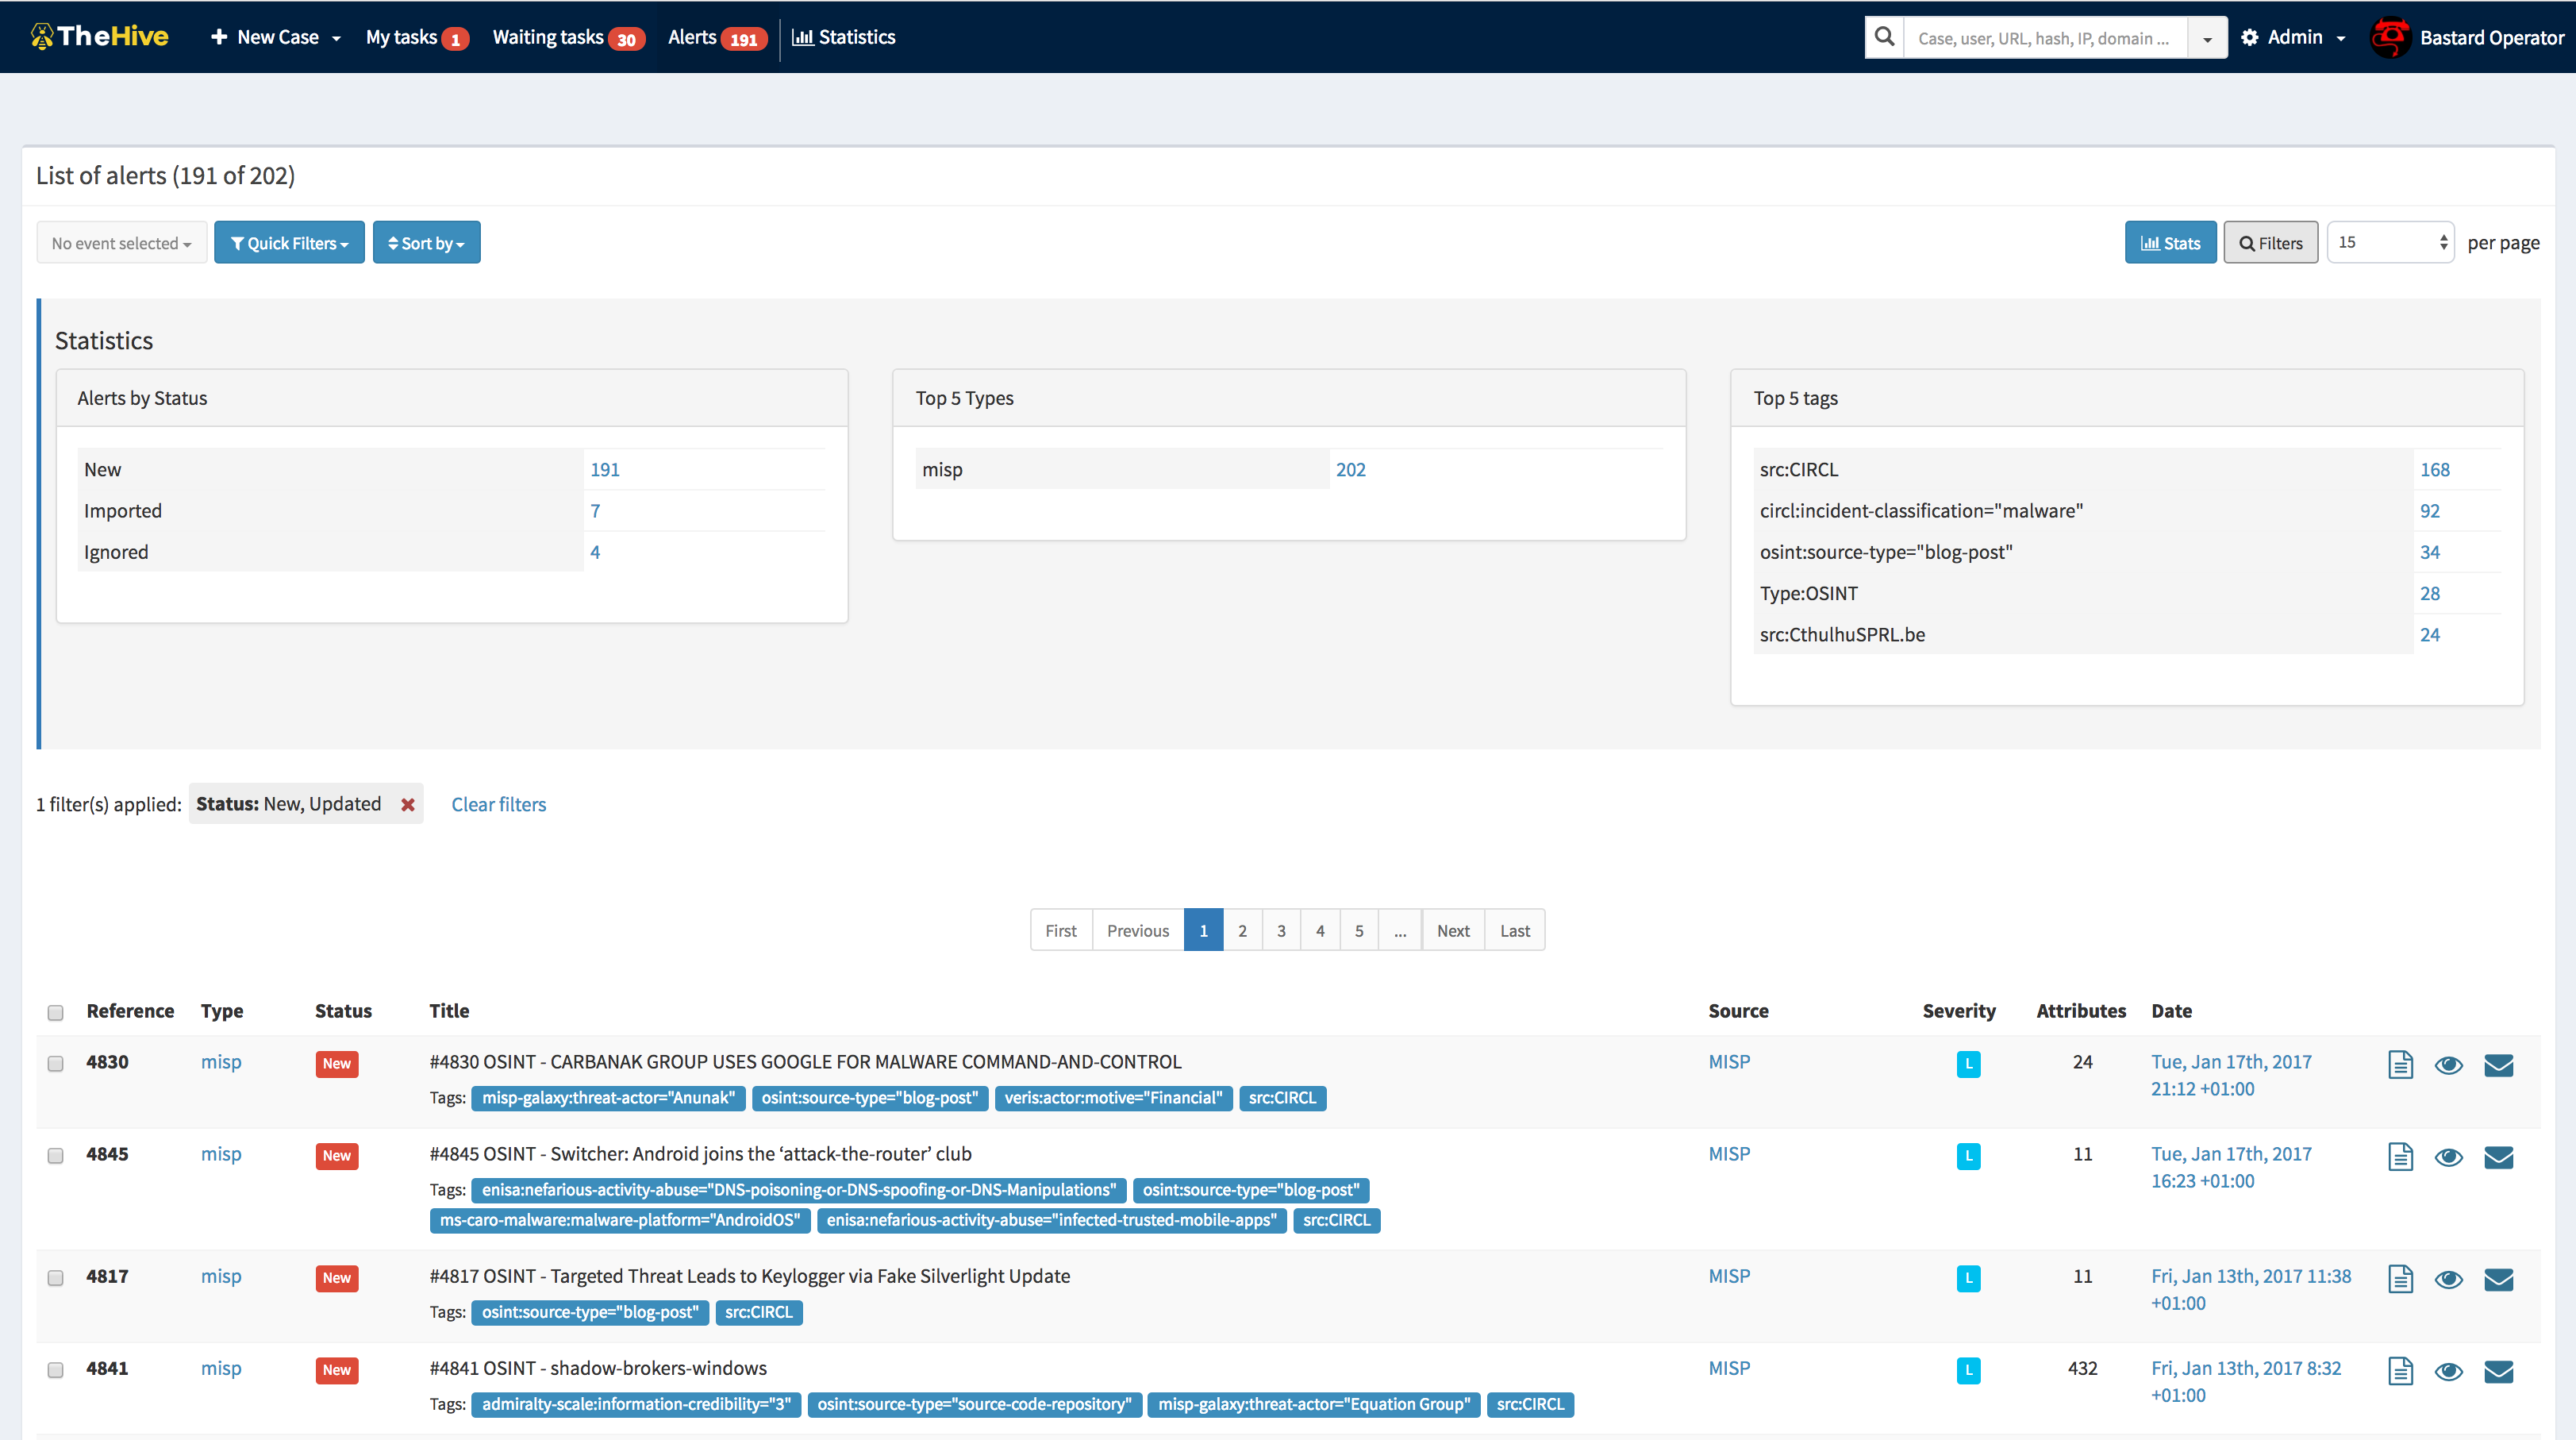
- Integration: It integrates with other security tools like MISP (Malware Information Sharing Platform) and Cortex for automated analysis.
- Alert Management: The platform can ingest alerts from various sources, enabling quick triage and prioritization.
- Customizable Dashboards: Users can create dashboards to visualize incident data and track performance metrics.
Types of Incidents Managed by TheHive
TheHive is versatile and can handle a wide range of security incidents, including:
Malware Infections: Identifying and mitigating malware threats.
Phishing Attacks: Analyzing phishing emails and preventing credential theft.
Unauthorized Access: Detecting and responding to unauthorized access attempts.
Data Breaches: Managing data breach investigations and remediation efforts.
Benefits of Using TheHive
TheHive enhances collaboration by offering a centralized platform for incident management, enabling security teams to work together more effectively. Its automation features significantly improve efficiency by reducing manual workloads, allowing teams to concentrate on critical tasks. As an open-source solution, TheHive is highly scalable and can be customized to fit the specific needs of any organization. Additionally, it is cost-effective, eliminating the licensing fees typically associated with proprietary solutions.
How to Use TheHive
Installation
- System Requirements: Ensure you have a compatible operating system (Linux-based systems are preferred), sufficient RAM (at least 8GB), and storage.
- Database Setup: Install Elasticsearch as it is required for data storage and retrieval.
- TheHive Installation:
- Download the latest version from the official GitHub repository.
- Follow the installation instructions provided in the documentation to configure the application.
Configuration
- User Management: Set up user accounts with appropriate roles and permissions.
- Integration Setup: Configure integrations with MISP, Cortex, or other security tools as needed.
- Alert Sources: Define alert sources to automatically ingest alerts into TheHive for analysis.
Case Management
- Creating Cases: Use templates or create custom cases based on incident types.
- Task Assignment: Assign tasks to team members with deadlines and priorities.
- Observable Analysis: Analyze observables using integrated tools or external services.
Monitoring and Reporting
- Dashboards: Create dashboards to monitor ongoing incidents and team performance.
- Reports: Generate reports for completed cases to document findings and actions taken.
Installing and using TheHive involves several technical steps, including setting up the necessary environment, configuring the application, and integrating it with other tools. Here’s a detailed guide to help you through the process:
Installation of TheHive
Prerequisites
- Operating System: TheHive is best supported on Linux-based systems, such as Ubuntu or CentOS.
- Java: Ensure that Java 11 or higher is installed on your system, as TheHive requires it to run.
- Elasticsearch: TheHive uses Elasticsearch for data storage and indexing. Install Elasticsearch 7.x, which is compatible with TheHive.
Steps to Install
- Install Java:
- On Ubuntu:
sudo apt-get install openjdk-11-jre - On CentOS:
sudo yum install java-11-openjdk
- Install Elasticsearch:
- Download and install Elasticsearch from the official website.
- Configure Elasticsearch by editing the
elasticsearch.ymlfile to set network host and other settings as needed.
- Download TheHive:
- Obtain the latest version of TheHive from the official GitHub repository or website.
- Install TheHive:
- Extract the downloaded package.
- Move the extracted files to a suitable directory, such as
/opt/thehive.
- Configure TheHive:
- Edit the configuration file (
application.conf) located in the installation directory. - Set database connection details, including Elasticsearch host and port.
- Configure other settings like authentication methods and email notifications.
- Start TheHive:
- Navigate to the installation directory and run the command:
./bin/thehive - Ensure that TheHive is running by accessing it via a web browser at
http://<your-server-ip>:9000.
Using TheHive
Initial Setup
- Accessing TheHive:
- Open a web browser and go to
http://<your-server-ip>:9000. - Log in using default credentials or create a new admin account if prompted.
- User Management:
- Create user accounts with appropriate roles (e.g., analyst, admin).
- Assign permissions based on responsibilities.
- Integration with Cortex:
- Install Cortex, which provides analysis capabilities for observables.
- Configure Cortex in TheHive by adding its URL and API key in the settings.
Creating and Managing Cases
- Creating a Case:
- Click on “New Case” and fill in details like title, description, severity, etc.
- Add tasks to outline steps for incident investigation.
- Adding Observables:
- Attach observables (e.g., IP addresses, hashes) to cases for analysis.
- Use Cortex analyzers to automatically analyze observables.
- Task Management:
- Assign tasks to team members with deadlines and priorities.
- Track task progress through the interface.
- Collaboration:
- Use comments and logs to communicate within cases.
- Collaborate with team members by sharing insights and updates.
Monitoring and Reporting
- Dashboards:
- Create custom dashboards to visualize incident data and track metrics.
- Use widgets to display specific information like case status or task completion rates.
- Generating Reports:
- Export case details and findings into reports for documentation.
- Use reports for post-incident analysis and process improvement.
By following these steps, you can effectively install and use TheHive to manage security incidents within your organization. Its integration capabilities, combined with robust case management features, make it a powerful tool for enhancing your security operations.
How TheHive Helps Prevent Incidents
Proactive Threat Hunting
TheHive supports proactive threat hunting by allowing analysts to search for indicators of compromise (IoCs) across historical data, helping identify potential threats before they escalate.
Automated Workflows
Automation reduces response times by triggering predefined workflows for common incidents, ensuring swift action is taken without manual intervention.
Knowledge Sharing
Integration with platforms like MISP enables sharing threat intelligence with other organizations, enhancing collective defense against emerging threats.
Continuous Improvement
By analyzing past incidents and response efforts, organizations can refine their processes and improve their overall security posture.
Conclusion
TheHive is a robust platform that enhances an organization’s ability to manage security incidents efficiently. Its open-source nature allows for customization and integration with existing tools, making it a versatile choice for organizations of all sizes. By streamlining incident response processes and fostering collaboration among team members, TheHive plays a crucial role in both responding to and preventing future security incidents.


%20(1).webp "Nessusploitable – Targeting Exploitable Nessus Vulnerabilities")
