Create a VPS on Google Cloud Platform or Digital Ocean easily to use Offensive Docker and launch the assessments to the targets.
Requirements
- Terraform installed (Version used: v0.13.0)
- Ansible installed (Version used: 2.9.12)
- SSH private and public keys
- Google Cloud Platform or Digital Ocean account.
Usage
- Clone the repository
git clone –depth 1 https://github.com/aaaguirrep/offensive-docker-vps.git vps
cd vps
- Credentials
- Create credentials folder. mkdir credentials
- For Google Cloud Platform
- Create a new project.
- Create service account with “Compute Admin” role and download a key in json format in credentials folder.
- Rename the key to gcp.json
- Enable “Compute Engine API” for the project.
- For Digital Ocean
- Create a Personal access tokens with write permission and copy it. See Tutorial
- SSH Private and Public keys
- Inside credentials folder run
ssh-keygen -t rsa -f offensivein the terminal. Empty passphrase is ok. - It creates two files: private and public key.
- Terraform
- Google Cloud Platform
- Enter to gcp folder and modify the next value:
- In main.tf file change the project value with your project-id.
- Run the next commands:
- Enter to gcp folder and modify the next value:
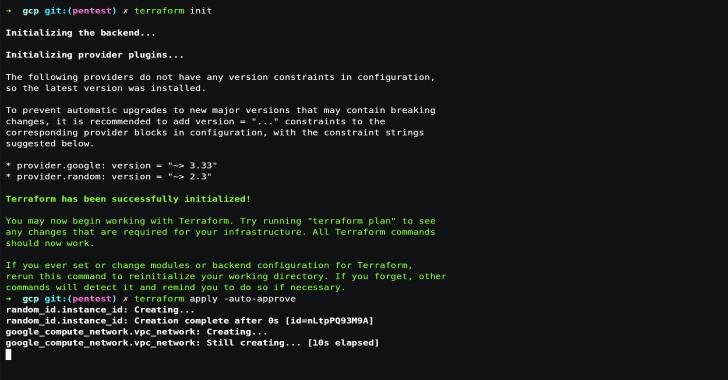
# Initialize terraform provider
$ terraform init
Terraform has been successfully initialized!
# Create the resources
$ terraform apply -auto-approve
Apply complete! Resources: 3 added, 0 changed, 0 destroyed.
Outputs:
external_ip = x.x.x.x
- Copy the external_ip value
Note: The instance type and the region used are: n1-standard-1 and us-central1. You can change the values on server.tf and main.tf
Demo
Digital Ocean
- Enter to digital-ocean folder
- With the personal access token copied run
export TF_VAR_do_token="Personal_Access_Token_Here" - Run the next commands:
# Initialize terraform provider
$ terraform init
Terraform has been successfully initialized!
# Create the resources
$ terraform apply -auto-approve
Apply complete! Resources: 3 added, 0 changed, 0 destroyed.
Outputs:
external_ip = x.x.x.x
- Copy the external_ip value
Note: The droplet type and the region used are: s-2vcpu-4gb and nyc3. You can change the values on server.tf and variables.tf
Demo
Ansible
- Enter to ansible folder
- In hosts.yaml change the x.x.x.x by external_ip value copied.
- Run the next command:
$ ansible-playbook playbook.yaml
TASK [Configuration finished] *******************************************************
ok: [x.x.x.x] => { “msg”: “System configured correctly.”
}
Demo
Access to VPS
- In gcp or digital-ocean folder run the next command. Change x.x.x.x by external_ip value copied.
# Access to VPS
$ ssh offensive@x.x.x.x -i ../credentials/offensive
Demo
Destroy the VPS
- In gcp or digital-ocean folder run the next command.
# Destroy the resource
$ terraform destroy -auto-approve
Note: For Digital Ocean, if you dont have a default VPC created in the region used it shows an error to destroy the VPC but no problem, it will destroy the others resources.

.webp)


.webp)


.png)
