SGXRay is a tool for Automating Vulnerability Detection for SGX Apps
Intel SGX protects isolated application logic and sensitive data inside an enclave with hardware-based memory encryption. To use such hardware-based security mechanism requires a strict programming model on memory usage, with complex APIs in and out the enclave boundary. Enclave developers are required to apply careful programming practices to ensure enclave security, especially when dealing with data flowing across the enclave’s trusted boundary. Trusted boundary violations can further cause memory corruption and are exploitable by attackers to retrieve and manipulate protected data. Currently, no publicly available tools can effectively detect such issues for real-world enclaves.
SGXRay is an automated reasoning tool based on the SMACK verifier that automatically detects SGX enclave bugs rooting from violations of trusted boundaries. It recompiles a given enclave code and starts the analysis from a user-specified enclave function entry. After the analysis, it either finds an invalid pointer handling inside an SGX software stack such as deferencing unchecked pointer inside an enclave, invalid memory deallocation, and TOCTOU bugs, or prove the absense of such bugs up to a user-specified loop and recursion bound.
Currently, SGXRay SGX applications built on two SGX SDKs: Intel SGX SDK and openenclave SDK. Users can opt in SDK code for a more thorough analysis.
For a quick start, please follow a step-by-step tutorial on using SGXRay over one of the demo examples here.
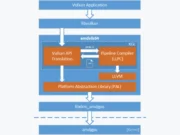
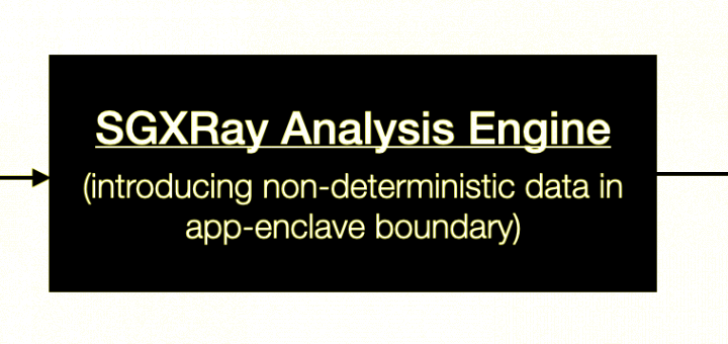
The following figure demonstrates the workflow of SGXRay.

Running SGXRay is a two-step process. The first step is to obtain an LLVM IR file for the application. The second step is to invoke SGXRay CLI for verification.
For the first step, we provide two Docker images for each SDK, respectively.
docker pull baiduxlab/sgx-ray-frontend-intel
docker pull baiduxlab/sgx-ray-frontend-oe
The detailed instructions to run the first step can be found here.
LLVM IR (BC) Production
The first step of running SGXRay is to obtain a single LLVM IR file for an SGX enclave application.We provide two Docker images for Intel SGX SDK and Open Enclave SDK, respectively.
This image contains Intel SDK SGX version 2.12 and Clang version 11.
To obtain the LLVM IR for your application, please run the Docker container interactively with your application directory mounted
cd # go to the root your SGX project
docker run -it –rm -v $(pwd):/sgx -w /sgx –user $UID:$(id -g) baiduxlab/sgx-ray-frontend-intel:latest
Inside the container, please run,
source /opt/sgxsdk/environment
source /opt/smack-wllvm/default.environment
make # your compilation command
extract-bc -l llvm-link-11 # this should produce enclave.so.bc
Open Enclave Frontend Image
This image contains openenclave version 0.16.1 and Clang version 8.
To obtain the LLVM IR for your application, please run the Docker container interactively with your application directory mounted,
cd # go to the root your SGX project
docker run -it –rm -v $(pwd):/sgx -w /sgx –user $UID:$(id -g) baiduxlab/sgx-ray-frontend-intel:latest
Inside the container, please run,
source /opt/openenclave/share/openenclave/openenclaverc
source /opt/smack-wllvm/oe.environment
make # your compilation command
extract-bc -l llvm-link-8 # this should produce enclave.so.bc
For the second step, we also provide a Docker image.
docker pull baiduxlab/sgx-ray-distro:latest
The detailed instructions to run the second step can be found here.
Verification
Currently, the verification step can only be done inside the Docker container we provide. We recommend run it interactively on our demo machine using the following command,
cd # go to the enclave directory that contains the bc file generated in the last step
docker run –rm -it -v $(pwd):/sgx -w /sgx –user $UID baiduxlab/sgx-ray-distro
Inside the container, you should be able to invoke the SGXRay CLI sgx-ray.
We provide a binary sgx-ray that acts as a wrapper to SMACK for verifying SGX applications. The options can be shown via sgx-ray --help. Currently, there are two backend verifiers — Boogie and Corral. Boogie tends to be faster whereas Corral offers better error traces. We recommend trying Boogie first. If a counterexample is found, one can use Corral to get a better understanding of it.
Basic Usage of Verification CLI
The basic usage of the SGXRay CLI is pretty simple. Let’s assume the SDK used to build your app is Intel SGX SDK.
sgx-ray –intel –ecall-name
Ecall names can be found in the EDL file of your app.
The important SMACK options can be found at the end of the demo video. We also reiterate the important ones here.
Recall that in the tutorial, we see SGXRay can successfully detect an invalid pointer usage in the ecall_error1 function of copytohost. If we apply the same command to ecall_error2, we will fail to see the error to be reported even though it exists. This is because the error shows up in the second iteration of the loop whereas SGXRay only examines the first iteration of the loop, after which it assumes the program exits. To find this error, we need SMACK option --unroll=2 which can be enabled using SGXRay’s option --smack-options='--unroll=2'.
sgx-ray enclave.so.bc –intel –ecall-name ecall_error2 –smack-options=”–unroll=2″
NULL-Pointer Check
There are two SMACK options related to null checks — --enable-null-check and --enable-failing-malloc. The former enables null checks inside the enclave and the the latter specifies that malloc can fail and return a null pointer. SGXRay does not enable null checks by default because null pointer dereferences are considered less destructive as opposed to other vulnerabilities such as writing to arbitary locations inside an enclave.
Docker Build
We provide a Dockerfile that builds the image for the verification step.
git clone https://github.com/baiduxlab/sgxray.git && cd sgxray
docker build . -t sgx-ray-distro-local –build-arg hostuid=$UID -f Dockerfiles/Dockerfile-CLI
Successful build should produce an image named sgx-ray-distro-local which has an user user with the same user id as the host account.


