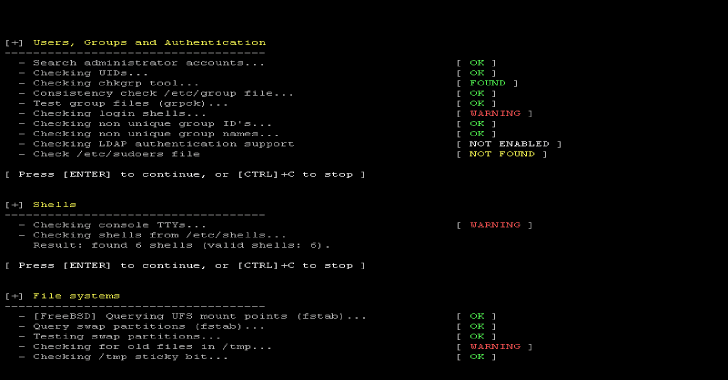
Lynis is a security auditing tool for UNIX derivatives like Linux, macOS, BSD, Solaris, AIX, and others. It performs an in-depth security scan. Software packages is available by clicking here.
Requirements
Shell and basic utilities
Permissions
Normal user or preferable root permissions
Installation
Installation via package
Installing the tool via a package manager is one option to get started with it. For most operating systems and distributions, a port or package is available.
First add our software repository. This way the latest version will be available to your system.
Red Hat
This applies to systems running YUM, including CentOS, Fedora, Red Hat Enterprise Linux (RHEL).
Also Read – Leviathan : Wide Range Mass Audit Toolkit
$ yum install lynis
Debian
Systems running Debian, Linux Mint, Ubuntu, or are based on one of these.
$ apt-get install lynis
openSUSE
$ zypper install lynis
Installation via Git
Clone project
The first step is cloning the project. Before doing so, select the parent directory. Git will create a subdirectory with the full program in it.
$ cd /usr/local
$ git clone https://github.com/CISOfy/lynis
Cloning into ‘lynis’…
remote: Counting objects: 1733, done.
remote: Compressing objects: 100% (8/8), done.
remote: Total 1733 (delta 3), reused 0 (delta 0), pack-reused 1725
Receiving objects: 100% (1733/1733), 886.18 KiB | 378.00 KiB/s, done.
Resolving deltas: 100% (1204/1204), done.
Checking connectivity… done.
$ cd lynis
That is it. Time to run your first security audit:
$ lynis audit system
Although no configuration is required, there are a few useful commands to learn.
Installation via direct download
- Create a directory
It can be started from each directory. So choose a directory where you want to store the tool. For our example purpose we use /usr/local/lynis, as the /usr/local directory exists on most distributions.
$ mkdir -p /usr/local/lynis
$ cd /usr/local
- Download
Next step is downloading the latest version of the tool into the /usr/local directory. In this method we use the compressed tarball, which is an archive of all files.
Go to the tool download page. Copy the link to the tarball (ends with tar.gz).
Use this link together with wget (usually installed by default). macOS users can use curl tool, where BSD users could use fetch.
$ wget https://cisofy.com/files/lynis-.tar.gz
or
$ curl https://cisofy.com/files/lynis-.tar.gz -o lynis.tar.gz
- Unpack the tarball
$ tar xfvz lynis-.tar.gz
Installation via Homebrew
For users of macOS, Homebrew can be used as an alternative to manual installation and using Git.
$ brew install lynis
After the installation with Homebrew, it is time to run it for the first time.
Running
If the tool was installed via a package or Homebrew, you can run it from any directory.
For the other methods, ensure that you are in the right directory and add ‘./’ in front of the command, like:
$ ./lynis
It can run without any preconfiguration. Configuration and fine-tuning is possible though and will be covered in later sections. For now we will run a basic scan:
$ lynis audit system
Lynis and Pauses
By default it starts and pauses after the first section. With CTRL+C you can stop the program. With ENTER it will continue to the next set of tests. If we want to run it without any pauses, we could give it an additional parameter: –quick. This will enable the “quick” option, ideal for running it while you do other things.
$ lynis audit system –quick
Features
It is security auditing tool, for Unix, Linux and macOS systems.
It is used by system administrators, auditors and security professionals, all over the world. Some of the features are:
Basics
- Open source
- Shell script
- No dependencies
- Easy to understand
Support
- Dynamic OS detection
- 300+ built-in tests
- Support for custom tests
- Plugin support
- Compliance checks
- Extensive software support
Reporting
- Report on screen and details in report file
- Reporting of warnings and suggestions
- Detailed logging
- Hardening index


