Redherd Framework is a collaborative and serverless framework for orchestrating a geographically distributed group of assets capable of conducting simulating complex offensive cyberspace operations.
The framework takes advantage of the “as a Service” paradigm in order to deploy a ready-to-use infrastructure that can also be adopted for effective training purposes, by reliably reproducing a real-world cyberspace scenario in which red and blue teams can challenge each other. RedHerd perfectly fits the Open Systems Architecture design pattern, thanks to the adoption of both open standards and wide-spread open source software components.
Terminology
| Name | Description |
|---|---|
asset | The multi-platform devices (Windows, Debian-like, RHEL-like, MacOS and Android) that can be orchestrated. |
client | The device used by an operator to interact with RedHerd components. |
module | The code implementation of a task that can be executed by asset. |
process | The dynamic instance of a module. |
task | The abstract representation of an operator intent. |
topic | A group of modules that shares a common intent (e.g. port scanning, Wi-Fi, …). |
Architecture
RedHerd uses some specialized Docker containers in order to integrate many community acclaimed open-source products with a custom application layer, implemented for interoperability purposes. These containers have been designed to compartmentalise features and to allow horizontal scaling if needed. The described architecture offers a high level of automation by allowing minimized user interaction during the asset setup process and is bounded by a Virtual Private Network (VPN) granting Operations Security (OPSEC) by design.

The main elements of the RedHerd framework are listed hereafter:
- Assets: multi-platform devices (
Windows,Debian-like,RHEL-like,MacOSandAndroid) that can be orchestrated to perform cyber operations; - Herd-Server: the Node.js core of the framework which is responsible for interacting with the assets. It receives and multiplexes all the inputs from the operators thanks to an extended set of Application Programming Interfaces (API) and dispatches the output received from the assets via a Socket.IO channel;
- File-Server: an FTPS-based server, which allows secure file transfer among operators and assets;
- OVPN-Server: the OpenVPN gateway for all entities interacting with the framework;
- Distribution-Server: the only component publicly accessible outside the VPN edge, which represents an Nginx web server that distributes, after authentication, all the configuration files needed by an entity attempting to join the framework;
- Herd-View: a Progressive Web Application (PWA) written in Angular that provides a user-friendly interface to monitor and task all the assets in real-time;
- Client: the device used by an operator to interct with the framework components.
Last but not least, Herd-CLI represents the administrative application for managing the entire framework.
Features

RedHerd has several overwhelming features that characterize it with strong orchestration capabilities:
- Intuitive Interface: it provides, through Herd-View, an intuitive web application to easily interact with the assets;
- Multi-Platform: it is able to orchestrate a wide range of devices, offering joining and tasking procedures for different operating systems (
Windows,Debian-like,RHEL-like,MacOSandAndroid); - Multi-User: it supports multi-user collaboration. The teamwork has become crucial for effective operations. In relation to this, joining RedHerd many users can task the same asset or operate independently;
- Agentless: it overcomes the requirement of a local agent waiting for a task to accomplish. Specifically, during the task warmup Herd-Server receives a job for an asset and initiates an SSH connection with it. Subsequently, it specializes and executes the set of commands needed to reach the expected result, allowing a lightweight computational effort asset-side;
- Easily Deployable: it is cross platform and can be deployed both on premise and in a Cloud-based environment. In order to grant this feature, a bash script has been proposed to automate the framework deployment process on a Debian-based distro. Taking into account the design choice to use docker-enabled containerization, an equivalent script could be easily developed allowing RedHerd to be hosted on a different operating system;
- Easily Expandable: it provides developer ready JavaScript specifications, offering an easy way to expand the product features by writing custom modules and accomplishing an uncountable number of tasks;
- Module Hot-Update: modules can be added, removed and updated on the fly. It is not needed a framework reboot or a new deployment;
- API Driven: it is driven by an extensive set of REST API which enables third party application to easily interact with and make use of the framework features.
Setup :: Intro
The entire solution is cross platform and can be deployed both on premise and in a Cloud-based environment. The released implementation focuses on a Debian host machine tested both locally and remotely.
System requirements
Following are some recommended and tested specifications for the host machine:
- Ubuntu >= 18.04
- 8+ GB RAM
- 50+ GB HDD
- 2+ CPUs
Obtain
The first step involves to obtain the latest release of the framework cloning it from the official GitHub repository:
$ git clone https://github.com/redherd-project/redherd-framework.git
Deploy
The second step includes the deploy of RedHerd on the host machine. It could be performed running the specifically developed deploy.sh bash script which implements a manually triggered but fully automated procedure on a Debian-based device.
Select the public interface
Select the external IP address which all assets/clients will connect to:
$ ip a 1: lo: <LOOPBACK,UP,LOWER_UP> mtu 65536 qdisc noqueue state UNKNOWN group default qlen 1000 link/loopback 00:00:00:00:00:00 brd 00:00:00:00:00:00 inet 127.0.0.1/8 scope host lo valid_lft forever preferred_lft forever inet6 ::1/128 scope host valid_lft forever preferred_lft forever 2: eth0: <BROADCAST,MULTICAST,UP,LOWER_UP> mtu 1500 qdisc mq state UP group default qlen 1000 link/ether 00:15:5d:01:84:00 brd ff:ff:ff:ff:ff:ff inet 172.23.163.163/20 brd 172.23.175.255 scope global dynamic noprefixroute eth0 valid_lft 82990sec preferred_lft 82990sec inet6 fe80::ab6c:c19c:6d33:aff1/64 scope link noprefixroute valid_lft forever preferred_lft forever
Install Docker
Before going further, Docker installation is necessary to deploy and launch the RedHerd framework:
$ cd redherd-framework $ sudo ./redherd-framework/utils/install_docker.sh
Launch the deploy script
Using the command line provided below, the deploy script will initialize the database (-db), generate the Certification Authority (CA) (-ca), the SSH keys (-k), the Distribution-Server credentials (-u) and the OpenVPN configurations for 10 (-a 10) endpoints (assets/clients). You can join to the framework up to 256 endpoints.
$ cd redherd-framework
$ sudo ./deploy.sh -s 172.23.163.163 -db -ca -k -u -a 10
- #
** (#
** ((#
* #((# ( ( (((((( #((((
((((((((((((((((((((#
((((((((((((((((((
** (((((((((((
(((((((# ( ((( _ _ _ _ _
* ((( |/ | | \ || | |/ | \ **** (( | _ | |/ | | | | _ |/
*** ((#
*** (((
[*] DETECTED PARAMETERS:
[!] INIT DB: TRUE
[!] GENERATE CA: TRUE
[!] GENERATE CERTS: TRUE
[!] GENERATE KEYS: TRUE
[!] GENERATE USERS: TRUE
[!] PUBLIC HOSTNAME: 172.23.163.163
[!] ASSETS COUNT: 10
[!] VPN NET CIDR: 10.11.0.0/16
[!] DOCKER OVPNSRV NAME: ovpnsrv
[!] DOCKER OVPNSRV ADDRESS: 10.10.0.2
[!] DOCKER HERDSRV NAME: herdsrv
[!] DOCKER HERDSRV ADDRESS: 10.10.0.3
[!] DOCKER HERDVIEW NAME: herdview
[!] DOCKER HERDVIEW ADDRESS: 10.10.0.5
[!] DOCKER FTPSRV NAME: ftpsrv
[!] DOCKER FTPSRV ADDRESS: 10.10.0.4
[!] DOCKER DSTRSRV NAME: dstrsrv
Continue? [y/N]: y
Check framework status
Once the deploy procedure has completed, check all dockers are up and running:
$ sudo docker ps CONTAINER ID IMAGE COMMAND CREATED STATUS PORTS NAMES 07839fcaec7e dstrsrv:latest “/docker-entrypoint.…” About a minute ago Up About a minute 80/tcp, 0.0.0.0:8443->443/tcp, :::8443->443/tcp dstrsrv 48beb5cb7eb8 herdview:latest “/docker-entrypoint.…” About a minute ago Up About a minute 80/tcp herdview f3fec616f317 ftpsrv:latest “/bin/sh -c ‘/run.sh…” 4 minutes ago Up 4 minutes 21/tcp, 30000-30009/tcp ftpsrv e12362fa5dca herdsrv:latest “docker-entrypoint.s…” 4 minutes ago Up 4 minutes 3000-3001/tcp herdsrv 4b5fe465f217 ovpnsrv:latest “ovpn_run” 7 minutes ago Up 7 minutes 0.0.0.0:1194->1194/udp, :::1194->1194/udp ovpnsrv
Initialize
Finally, the first user, aka the System User, has to be generated in order to initialize the framework:
$ sudo herd-cli user -a firstuser New User Password: [-] Attempting to create the new user [!] Operation successfully completed
Framework Management :: Intro
This section provides a deeper insight on how to fully manage the framework deployment process and all its features.
Destroy
The deploy script can also be used to take the framework down:
$ sudo ./deploy.sh -d
- #
** (#
** ((#
* #((# ( ( (((((( #((((
((((((((((((((((((((#
((((((((((((((((((
** (((((((((((
(((((((# ( ((( _ _ _ _ _
* ((( |/ | | \ || | |/ | \ **** (( | _ | |/ | | | | _ |/
*** ((#
*** (((
[*] Docker environment cleanup
ovpnsrv
Untagged: ovpnsrv:latest
Deleted: sha256:91e78a2d4ce5fb45970d261909f113d0062109702f8ec0ec757b2a7858ff5d23
Deleted: sha256:5693be9dc0dc0f0ecf136f37475a4b9adf31c0a72894b687822690db7e1f1e8c
Deleted: sha256:852d8501542f54dbe5754f7fd73d807c4203f66d62ff54d99c119419a02bca2b
Deleted: sha256:869c88433db452ed79c7162582047dcfbaf47b209317ec1fa6b71a9c40b96ecd
Deleted: sha256:6b07e4131caa0156ed54f2b2ce27f0c03a3d50e03cc3cc6767d1b69cf4a7205e
Deleted: sha256:0e459de7b327a61e34e29b6a07c06ea38797c5202e5e3819eee5f8a23553ca08
Deleted: sha256:b7404afcdd25a8b70ad5873c4094d13f1975a58acf81885e7d88de7288365c11
Deleted: sha256:b43b3ed5d13e7f800a5ec9e6d3072d32ece187eb182be07245910f95787f5093
Deleted: sha256:be6ba2aa03790eb8336b8464eb14cdcb34270e6cdb22d83a0e11b20919181214
Deleted: sha256:07fc7232db98106e694a0234a0ab7ba19286133832192a299a70ecec4dce5682
Deleted: sha256:e1c5528f18db384fa8373d701f3e61af0e2c1656733af27959ae587a83b457d4
Deleted: sha256:8f1cece9330a25a1cf795ba78562059f326138fbea5e2749d64dd5a3d70f4050
Deleted: sha256:9bfcecbeeb774e41e9561e686a4afb7f5012316ef7e271ab017082692b182298
Deleted: sha256:bfa09c8289fbcc8791c8a174d545cea0fa5f4617c26aa30f1b07ff494b010ad0
Deleted: sha256:45ba11e8699b99fec50b655797907112cc6246280f146774f42a33cca8cc8408
Deleted: sha256:36fcb8e0144e44d9c85aadb569122350252c74320b619dbf4cc458da3173cae4
Deleted: sha256:6ce35068dce464cfd49e7bfa8f0cb9ac384e687732d7d26074873ba63388b915
herdsrv
Untagged: herdsrv:latest
Deleted: sha256:58d8b77f4eaa2252921cd77d5cfd496f29cd6fe6d23463b28ae8233d65e2731a
Deleted: sha256:116de39c14160d43d2a3fb24aed18b9c9b2228ae0d8e5cec533990c01548cf95
Deleted: sha256:b042ec9beedfd8aaa9b070900a080385ea705003a97633b2a3710b3a25c90740
Deleted: sha256:e68cb0e1bd2b8346e2de7dde87ae5d2b7dba3b1497cb30b954bebd6fe86edb52
Deleted: sha256:e17cca51ca5993a778056672511ae01f4b5231a14add9ea7dd7145a8cf24c9a9
Deleted: sha256:ecf85fbbcde4f995c90ad19b7da82314fd0bcacf8bc085c296e7dba33edf7551
Deleted: sha256:96797af7230236fe1eae96e3bea3ad38453c277f36c8a298d4ecc27cb1892eee
Deleted: sha256:693d0d723aced0e2121968489f25c1e8a206c7c170893777c251af498cedff6e
Deleted: sha256:4ea4c8116ce073d39f6b95fe774ad873ea072c171d2c78dd9e5e130bc6b2ff7a
Deleted: sha256:8bbf0fdc143fdc22558d4c2f120e59a655146f3f285775e071cc2e1f79b92339
Deleted: sha256:308cccf6a89553f19e45a79c043ac83025181ca1b3c00268ae765ec228626b2f
Deleted: sha256:4ca64ce92227b399e4749a970027b149b7e0ba167186f3822fae0c9c9e1391dc
Deleted: sha256:17d8b36dd94c4ddfbfe4784bdd20d9b6b5769f4eca6e4efdb43d01d5d6f0cfd4
Deleted: sha256:2e9271591c173b6ab793635240a224e830a8cc36cad9b21d7f1e772d95e8143d
Deleted: sha256:5c62079596e97e4221a3b510558e8853fa6fc1dae3549e8785b6777215984a46
Deleted: sha256:34631d73d29e214ffda5cda7e1660769a7dd3ca5736582bcc63a232f4d42cc7f
Deleted: sha256:5bf2516c48fa1fee5522ad761de3f8a4329b50fd8178b252e39cab3bc7db9b77
Deleted: sha256:81f6727d260bf8f8ba3c26e316c88e20673f294bc06e60ff28861f43d976493e
Deleted: sha256:1119f1e7303603bc416e90ae0c6b4124b23bfa9b2aafec1af4273782449c5914
ftpsrv
Untagged: ftpsrv:latest
Deleted: sha256:42f92a4ddd6dc98221542a9e28982ce9674bac081636edfcf8e86a5e04cc3af1
Deleted: sha256:d159c5cb39cc834e02e833c3ddb6bb6a9c80a4a6a9b653251c56d0284342cb1d
herdview
Untagged: herdview:latest
Deleted: sha256:8b351a7109b26167045ace8118ebd63fabb35db531973c664c9a103cc673a4db
Deleted: sha256:2c67a03feece34a56f65a77b37d345f3abfece9b97cf1f2631c4ea571148d5ce
dstrsrv
Untagged: dstrsrv:latest
Total reclaimed space: 0B
internal
ovpn-data-server
Once the script has completed, you can verify that no RedHerd dockers are up:
$ sudo docker ps CONTAINER ID IMAGE COMMAND CREATED STATUS PORTS NAMES
Quick-deploy
Select the external IP address to which all assets/clients will connect:
$ ip a
1: lo: mtu 65536 qdisc noqueue state UNKNOWN group default qlen 1000
link/loopback 00:00:00:00:00:00 brd 00:00:00:00:00:00
inet 127.0.0.1/8 scope host lo
valid_lft forever preferred_lft forever
inet6 ::1/128 scope host
valid_lft forever preferred_lft forever
2: eth0: mtu 1500 qdisc mq state UP group default qlen 1000
link/ether 00:15:5d:01:84:00 brd ff:ff:ff:ff:ff:ff
inet 172.23.163.163/20 brd 172.23.175.255 scope global dynamic noprefixroute eth0
valid_lft 82990sec preferred_lft 82990sec
inet6 fe80::ab6c:c19c:6d33:aff1/64 scope link noprefixroute
valid_lft forever preferred_lft forever
Deploy the framework for the desired number of assets/client (e.g. -a 10):
$ cd redherd-framework
$ sudo ./deploy.sh -s 172.23.163.163 -a 10
- #
** (#
** ((#
* #((# ( ( (((((( #((((
((((((((((((((((((((#
((((((((((((((((((
** (((((((((((
(((((((# ( ((( _ _ _ _ _
* ((( |/ | | \ || | |/ | \ **** (( | _ | |/ | | | | _ |/
*** ((#
*** (((
[*] DETECTED PARAMETERS:
[!] INIT DB: FALSE
[!] GENERATE CA: FALSE
[!] GENERATE CERTS: FALSE
[!] GENERATE KEYS: FALSE
[!] GENERATE USERS: FALSE
[!] PUBLIC HOSTNAME: 172.23.163.163
[!] ASSETS COUNT: 10
[!] VPN NET CIDR: 10.11.0.0/16
[!] DOCKER OVPNSRV NAME: ovpnsrv
[!] DOCKER OVPNSRV ADDRESS: 10.10.0.2
[!] DOCKER HERDSRV NAME: herdsrv
[!] DOCKER HERDSRV ADDRESS: 10.10.0.3
[!] DOCKER HERDVIEW NAME: herdview
[!] DOCKER HERDVIEW ADDRESS: 10.10.0.5
[!] DOCKER FTPSRV NAME: ftpsrv
[!] DOCKER FTPSRV ADDRESS: 10.10.0.4
[!] DOCKER DSTRSRV NAME: dstrsrv
Continue? [y/N]: y
Database re-initialization
Deploy the framework and re-initialize the local database:
$ cd redherd-framework
$ sudo ./deploy.sh -s 172.23.163.163 -a 10 -db
- #
** (#
** ((#
* #((# ( ( (((((( #((((
((((((((((((((((((((#
((((((((((((((((((
** (((((((((((
(((((((# ( ((( _ _ _ _ _
* ((( |/ | | \ || | |/ | \ **** (( | _ | |/ | | | | _ |/
*** ((#
*** (((
[*] DETECTED PARAMETERS:
[!] INIT DB: TRUE
[!] GENERATE CA: FALSE
[!] GENERATE CERTS: FALSE
[!] GENERATE KEYS: FALSE
[!] GENERATE USERS: FALSE
[!] PUBLIC HOSTNAME: 172.23.163.163
[!] ASSETS COUNT: 10
[!] VPN NET CIDR: 10.11.0.0/16
[!] DOCKER OVPNSRV NAME: ovpnsrv
[!] DOCKER OVPNSRV ADDRESS: 10.10.0.2
[!] DOCKER HERDSRV NAME: herdsrv
[!] DOCKER HERDSRV ADDRESS: 10.10.0.3
[!] DOCKER HERDVIEW NAME: herdview
[!] DOCKER HERDVIEW ADDRESS: 10.10.0.5
[!] DOCKER FTPSRV NAME: ftpsrv
[!] DOCKER FTPSRV ADDRESS: 10.10.0.4
[!] DOCKER DSTRSRV NAME: dstrsrv
Continue? [y/N]: y
Certification Authority regeneration
Deploy the framework and regenerate the Certification Authority:
$ cd redherd-framework
$ sudo ./deploy.sh -s 172.23.163.163 -a 10 -ca
- #
** (#
** ((#
* #((# ( ( (((((( #((((
((((((((((((((((((((#
((((((((((((((((((
** (((((((((((
(((((((# ( ((( _ _ _ _ _
* ((( |/ | | \ || | |/ | \ **** (( | _ | |/ | | | | _ |/
*** ((#
*** (((
[*] DETECTED PARAMETERS:
[!] INIT DB: FALSE
[!] GENERATE CA: TRUE
[!] GENERATE CERTS: TRUE
[!] GENERATE KEYS: FALSE
[!] GENERATE USERS: FALSE
[!] PUBLIC HOSTNAME: 172.23.163.163
[!] ASSETS COUNT: 10
[!] VPN NET CIDR: 10.11.0.0/16
[!] DOCKER OVPNSRV NAME: ovpnsrv
[!] DOCKER OVPNSRV ADDRESS: 10.10.0.2
[!] DOCKER HERDSRV NAME: herdsrv
[!] DOCKER HERDSRV ADDRESS: 10.10.0.3
[!] DOCKER HERDVIEW NAME: herdview
[!] DOCKER HERDVIEW ADDRESS: 10.10.0.5
[!] DOCKER FTPSRV NAME: ftpsrv
[!] DOCKER FTPSRV ADDRESS: 10.10.0.4
[!] DOCKER DSTRSRV NAME: dstrsrv
Continue? [y/N]: y
Distribution-Server credentials regeneration
Deploy the framework and regenerate all credentials relative to Distribution-Server:
$ cd redherd-framework
$ sudo ./deploy.sh -s 172.23.163.163 -a 10 -u
- #
** (#
** ((#
* #((# ( ( (((((( #((((
((((((((((((((((((((#
((((((((((((((((((
** (((((((((((
(((((((# ( ((( _ _ _ _ _
* ((( |/ | | \ || | |/ | \ **** (( | _ | |/ | | | | _ |/
*** ((#
*** (((
[*] DETECTED PARAMETERS:
[!] INIT DB: FALSE
[!] GENERATE CA: FALSE
[!] GENERATE CERTS: FALSE
[!] GENERATE KEYS: FALSE
[!] GENERATE USERS: TRUE
[!] PUBLIC HOSTNAME: 172.23.163.163
[!] ASSETS COUNT: 10
[!] VPN NET CIDR: 10.11.0.0/16
[!] DOCKER OVPNSRV NAME: ovpnsrv
[!] DOCKER OVPNSRV ADDRESS: 10.10.0.2
[!] DOCKER HERDSRV NAME: herdsrv
[!] DOCKER HERDSRV ADDRESS: 10.10.0.3
[!] DOCKER HERDVIEW NAME: herdview
[!] DOCKER HERDVIEW ADDRESS: 10.10.0.5
[!] DOCKER FTPSRV NAME: ftpsrv
[!] DOCKER FTPSRV ADDRESS: 10.10.0.4
[!] DOCKER DSTRSRV NAME: dstrsrv
Continue? [y/N]: y
Client Management :: Intro
As for the asset also for the client we have tried to provide high flexibility and reduced interaction. Again, a one-line script interacts with Distribution-Server, downloads the user-related OpenVPN configuration file and initiates the VPN encrypted channel.
Docker
The dockerized client case is the most simple. The one-liner provided locally by the Herd-CLI creates an Ubuntu container that joins the infrastructure and allows the host machine to act as a client:
$ herd-cli endpoint -s 172.23.16.16 -o docker -m client -i 1
- #
** (#
** ((#
* #((# ( ( (((((( #((((
((((((((((((((((((((#
((((((((((((((((((
** (((((((((((
(((((((# ( ((( _ _ _ _ _
* ((( |/ | | \ || | |/ | \ **** (( | _ | |/ | | | | _ |/
*** ((# Command-line Interface
*** (((
sudo docker run -d –rm –cap-add=NET_ADMIN –device /dev/net/tun -e DSTRSRV_PUBLIC_ADDRESS=”172.23.16.16″ -e USERNAME=”HyXqpOOx41″ -e PASSWORD=”l9tcuv6GKUDBYtcyt2fyEcktDE578cs1″ –network host -v $(pwd)/redherd-certificates:/usr/local/share/ca-certificates –name redherd-client redherd/client
Debian
It is just required to run the Herd-CLI one-liner on the Debian host:
$ herd-cli endpoint -s 172.23.16.16 -o debian -m client -i 1
- #
** (#
** ((#
* #((# ( ( (((((( #((((
((((((((((((((((((((#
((((((((((((((((((
** (((((((((((
(((((((# ( ((( _ _ _ _ _
* ((( |/ | | \ || | |/ | \ **** (( | _ | |/ | | | | _ |/
*** ((# Command-line Interface
*** (((
sudo bash -c “apt update && apt install openvpn -y && curl -k -u HyXqpOOx41:l9tcuv6GKUDBYtcyt2fyEcktDE578cs1 https://172.23.16.16:8443/f6865d8c51bb7a1ba155bdfbeb3f686e/config.ovpn > ./redherd.ovpn && /usr/sbin/openvpn ./redherd.ovpn
Windows
Download and install the OpenVPN-Client, then use the PowerShell one-liner to download the OpenVPN configuration.
$ herd-cli endpoint -s 172.23.16.16 -o windows -m client -i 1
- #
** (#
** ((#
* #((# ( ( (((((( #((((
((((((((((((((((((((#
((((((((((((((((((
** (((((((((((
(((((((# ( ((( _ _ _ _ _
* ((( |/ | | \ || | |/ | \ **** (( | _ | |/ | | | | _ |/
*** ((# Command-line Interface
*** ((( $block = {
[Net.ServicePointManager]::ServerCertificateValidationCallback = {$true}; $webclient = New-Object System.Net.WebClient; $basic = [System.Convert]::ToBase64String([System.Text.Encoding]::ASCII.GetBytes(“HyXqpOOx41” + “:” + “l9tcuv6GKUDBYtcyt2fyEcktDE578cs1”));$webclient.Headers[“Authorization”] = “Basic “;
$webclient.DownloadFile(“https://172.23.16.16:8443/f6865d8c51bb7a1ba155bdfbeb3f686e/config.ovpn”, “redherd.ovpn”)
}; powershell -ep bypass -nop -c $block
[!] Manually run OpenVPN with downloaded redherd.ovpn config file
Android
Download and install the OpenVPN-Client, then download the OpenVPN configuration from the provided link
$ herd-cli endpoint -s 172.23.16.16 -o android -m client -i 1
- #
** (#
** ((#
* #((# ( ( (((((( #((((
((((((((((((((((((((#
((((((((((((((((((
** (((((((((((
(((((((# ( ((( _ _ _ _ _
* ((( |/ | | \ || | |/ | \ **** (( | _ | |/ | | | | _ |/
*** ((# Command-line Interface
*** (((
[!] Manually download the OpenVPN config file:
[!] Url: https://172.23.16.16:8443/f6865d8c51bb7a1ba155bdfbeb3f686e/config.ovpn
[!] Username: HyXqpOOx41
[!] Password: l9tcuv6GKUDBYtcyt2fyEcktDE578cs1
MacOS
Download and install the OpenVPN-Client, then use the Zsh one-liner to download the OpenVPN configuration.
$ herd-cli endpoint -s 172.23.16.16 -o macos -m client -i 1
- #
** (#
** ((#
* #((# ( ( (((((( #((((
((((((((((((((((((((#
((((((((((((((((((
** (((((((((((
(((((((# ( ((( _ _ _ _ _
* ((( |/ | | \ || | |/ | \ **** (( | _ | |/ | | | | _ |/
*** ((# Command-line Interface
*** (((
curl -k -u HyXqpOOx41:l9tcuv6GKUDBYtcyt2fyEcktDE578cs1 https://172.23.16.16:8443/f6865d8c51bb7a1ba155bdfbeb3f686e/config.ovpn > ./redherd.ovpn
[!] Manually run OpenVPN with the downloadedredherd.ovpnconfig file
Herd-View Access
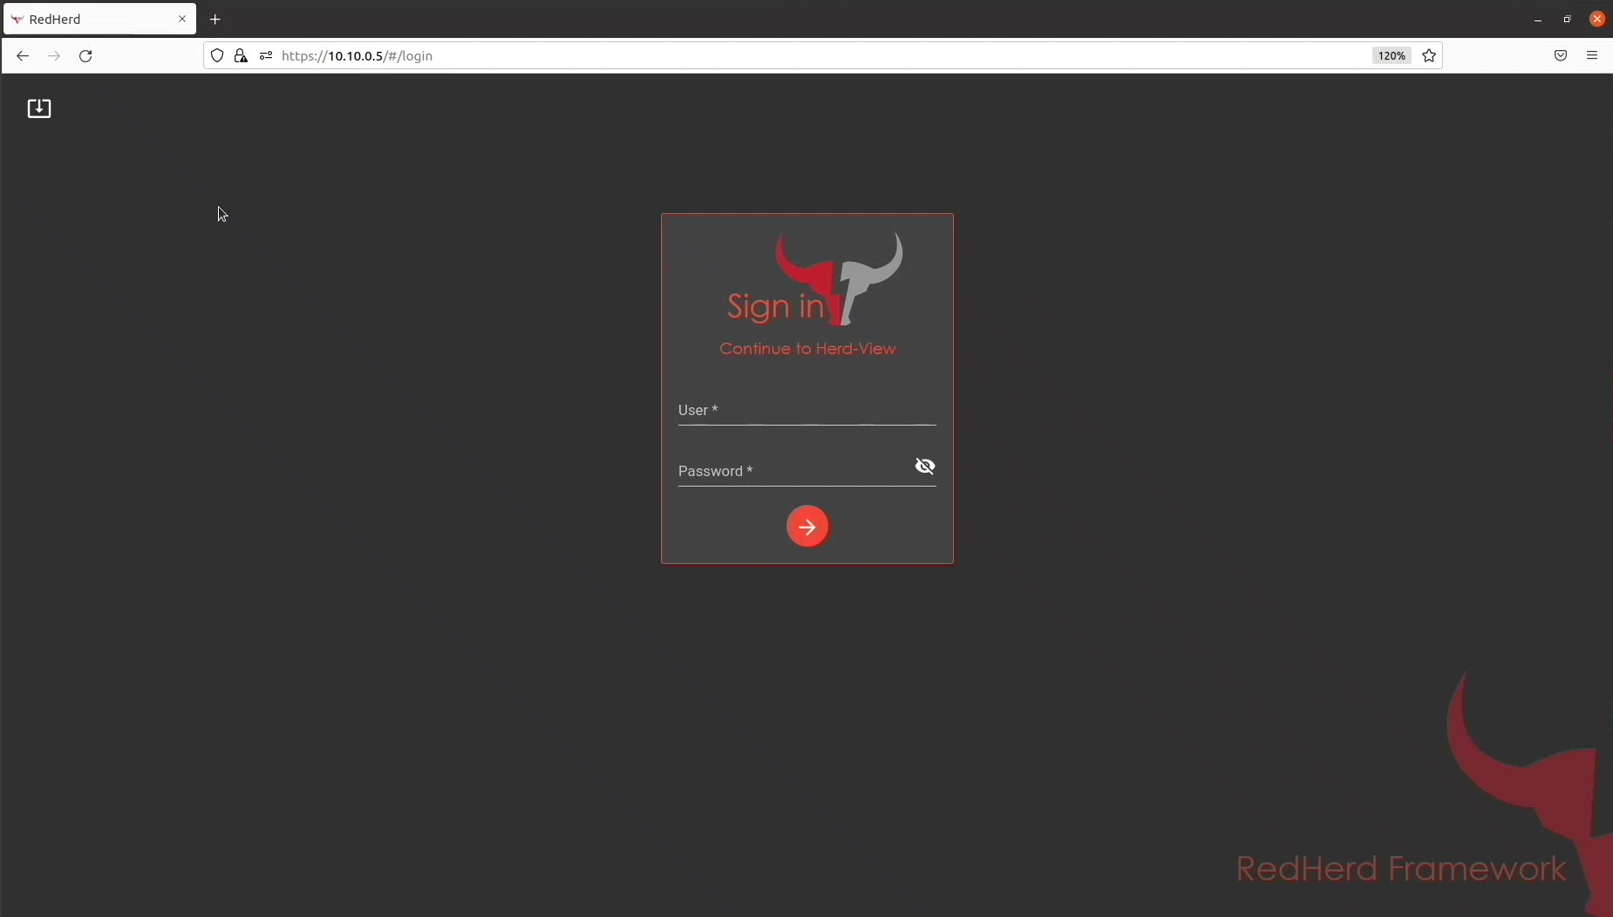
After successfully joined the framework VPN, connect to Herd-View using a browser and visiting the URL https://10.10.0.5, then download the RedHerd Certification Authority certificate clicking on the upper-left button and install it in your system. Alternatively, you can obtain this certificate directly from https://10.10.0.3:3000/ca.crt.


Once the certificate has been trusted, it is possible to fill the login page with your user credentials.h

Asset Management :: Intro
One of the aspects which is particularly relevant is the asset setup and join procedure. The implementation of this feature has been ruled by two design drivers: high flexibility and low user interaction. The former characteristic is needed in order to grant a remarkable level of compatibility with different operating systems, while the latter is fundamental to minimize failures and reduce the skills required to add a new asset to RedHerd. The result is a manually triggered yet fully automated procedure that involves only the execution of a one-line script which is different for each compatible platform: Bash for Android and Linux, PowerShell for Windows and Zsh for MacOS.
This one-liner interacts with Distribution-Server and acts as a dropper downloading the full setup script and the related OpenVPN configuration file. The second stage fully configures the device in order to fulfill the framework requirements, i.e., dependencies management, certificate trusting, firewall and SSH daemon set up. Then, the VPN connection is initiated and the API are used to interact with Herd-Server and insert the new asset into the framework database. At this point, the asset is effectively part of the framework and so it is completely accessible by the operators.
Docker
Add
$ herd-cli endpoint -s 172.23.16.16 -o docker -m install -i 2
- #
** (#
** ((#
* #((# ( ( (((((( #((((
((((((((((((((((((((#
((((((((((((((((((
** (((((((((((
(((((((# ( ((( _ _ _ _ _
* ((( |/ | | \ || | |/ | \ **** (( | _ | |/ | | | | _ |/
*** ((# Command-line Interface
*** (((
sudo docker run -d –rm –cap-add=NET_ADMIN –device /dev/net/tun -e DSTRSRV_PUBLIC_ADDRESS=”172.23.16.16″ -e USERNAME=”78l8zUBjpm” -e PASSWORD=”2GHDUWvZxtbn18LeiVoEv4UmhGv0rUrY” –privileged=true –network host –name redherd-asset redherd/asset
Remove
$ herd-cli endpoint -s 172.23.16.16 -o docker -m remove -i 2
- #
** (#
** ((#
* #((# ( ( (((((( #((((
((((((((((((((((((((#
((((((((((((((((((
** (((((((((((
(((((((# ( ((( _ _ _ _ _
* ((( |/ | | \ || | |/ | \ **** (( | _ | |/ | | | | _ |/
*** ((# Command-line Interface
*** (((
sudo docker stop redherd-asset
Debian
Add
$ herd-cli endpoint -s 172.23.16.16 -o debian -m install -i 2 * # ** (# ** ((# *** #((# ****( (***** (((((( #(((( ******************* ((((((((((((((((((((# ***************** (((((((((((((((((( *********** ((((((((((( ******* (((((((# (***** ((( ______ _______ ______ _ _ _______ ______ ______ ***** ((( |_____/ |______ | \ |_____| |______ |_____/ | \ **** (( | \_ |______ |_____/ | | |______ | \_ |_____/ *** ((# Command-line Interface *** ((( sudo bash -c “curl -k -u 78l8zUBjpm:2GHDUWvZxtbn18LeiVoEv4UmhGv0rUrY https://172.23.16.16:8443/50f3331a80894d85bcda8c4b404a919c/debian_asset_setup.sh > /tmp/script.sh && chmod +x /tmp/script.sh && /tmp/script.sh install && rm -rf /tmp/script.sh“
Remove
$ herd-cli endpoint -s 172.23.16.16 -o debian -m remove -i 2
- #
** (#
** ((#
* #((# ( ( (((((( #((((
((((((((((((((((((((#
((((((((((((((((((
** (((((((((((
(((((((# ( ((( _ _ _ _ _
* ((( |/ | | \ || | |/ | \ **** (( | _ | |/ | | | | _ |/
*** ((# Command-line Interface
*** (((
sudo bash -c “curl -k -u 78l8zUBjpm:2GHDUWvZxtbn18LeiVoEv4UmhGv0rUrY https://172.23.16.16:8443/50f3331a80894d85bcda8c4b404a919c/debian_asset_setup.sh > /tmp/script.sh && chmod +x /tmp/script.sh && /tmp/script.sh remove && rm -rf /tmp/script.sh”
CentOS
Add
$ herd-cli endpoint -s 172.23.16.16 -o centos -m install -i 2
- #
** (#
** ((#
* #((# ( ( (((((( #((((
((((((((((((((((((((#
((((((((((((((((((
** (((((((((((
(((((((# ( ((( _ _ _ _ _
* ((( |/ | | \ || | |/ | \ **** (( | _ | |/ | | | | _ |/
*** ((# Command-line Interface
*** (((
sudo bash -c “curl -k -u 78l8zUBjpm:2GHDUWvZxtbn18LeiVoEv4UmhGv0rUrY https://172.23.16.16:8443/50f3331a80894d85bcda8c4b404a919c/debian_asset_setup.sh > /tmp/script.sh && chmod +x /tmp/script.sh && /tmp/script.sh install && rm -rf /tmp/script.sh”
Remove
$ herd-cli endpoint -s 172.23.16.16 -o centos -m remove -i 2
- #
** (#
** ((#
* #((# ( ( (((((( #((((
((((((((((((((((((((#
((((((((((((((((((
** (((((((((((
(((((((# ( ((( _ _ _ _ _
* ((( |/ | | \ || | |/ | \ **** (( | _ | |/ | | | | _ |/
*** ((# Command-line Interface
*** (((
sudo bash -c “curl -k -u 78l8zUBjpm:2GHDUWvZxtbn18LeiVoEv4UmhGv0rUrY https://172.23.16.16:8443/50f3331a80894d85bcda8c4b404a919c/debian_asset_setup.sh > /tmp/script.sh && chmod +x /tmp/script.sh && /tmp/script.sh remove && rm -rf /tmp/script.sh”
Windows
Add
$ herd-cli endpoint -s 172.23.16.16 -o windows -m install -i 2
- #
** (#
** ((#
* #((# ( ( (((((( #((((
((((((((((((((((((((#
((((((((((((((((((
** (((((((((((
(((((((# ( ((( _ _ _ _ _
* ((( |/ | | \ || | |/ | \ **** (( | _ | |/ | | | | _ |/
*** ((# Command-line Interface
*** ((( $block = {
[Net.ServicePointManager]::ServerCertificateValidationCallback = {$true}; $webclient = New-Object System.Net.WebClient; $basic = [System.Convert]::ToBase64String([System.Text.Encoding]::ASCII.GetBytes(“78l8zUBjpm” + “:” + “2GHDUWvZxtbn18LeiVoEv4UmhGv0rUrY”));$webclient.Headers[“Authorization”] = “Basic “;
$webclient.DownloadFile(“https://172.23.16.16:8443/50f3331a80894d85bcda8c4b404a919c/windows_asset_setup.psm1”, “script.psm1”)
Import-Module .\script.psm1; Add-Asset; Remove-Item .\script.psm1;
}; powershell -ep bypass -nop -c $bloc
Remove
$ herd-cli endpoint -s 172.23.16.16 -o windows -m remove -i 2
- #
** (#
** ((#
* #((# ( ( (((((( #((((
((((((((((((((((((((#
((((((((((((((((((
** (((((((((((
(((((((# ( ((( _ _ _ _ _
* ((( |/ | | \ || | |/ | \ **** (( | _ | |/ | | | | _ |/
*** ((# Command-line Interface
*** ((( $block = {
[Net.ServicePointManager]::ServerCertificateValidationCallback = {$true}; $webclient = New-Object System.Net.WebClient; $basic = [System.Convert]::ToBase64String([System.Text.Encoding]::ASCII.GetBytes(“78l8zUBjpm” + “:” + “2GHDUWvZxtbn18LeiVoEv4UmhGv0rUrY”));$webclient.Headers[“Authorization”] = “Basic “;
$webclient.DownloadFile(“https://172.23.16.16:8443/50f3331a80894d85bcda8c4b404a919c/windows_asset_setup.psm1”, “script.psm1”)
Import-Module .\script.psm1; Remove-Asset; Remove-Item .\script.psm1;
}; powershell -ep bypass -nop -c $block
Asset Ban
During the RedHerd Framework lifecycle it is possible that some assets have to be excluded from the operative network due to kidnapping or simply for administrative reasons. This scenario could involve mainly two actions: Full Asset Ban and Single Asset Ban.
Full Asset Ban
In this situation the quickest method is to regenerate the RedHerd Certification Authority, this action cuts off all assets contemporary.
Single Asset Ban
In this case Herd-CLI offers an administrative command which allows to revoke the VPN certificate assigned to a specific asset. This command is part of the asset realm and requires the asset name.
$ sudo herd-cli asset -b vVDNDUUGjb [-] Attempting to revoke client certificate [!] Certificate successfully revoked


