WinPwnage meaning is to study the techniques. Techniques are found online, on different blogs and repos here on GitHub. I do not take credit for any of the findings, thanks to all the researchers.
Rewrote them and ported it to Python 2.7. The code under todo folders are not tested, do not expect it to work.
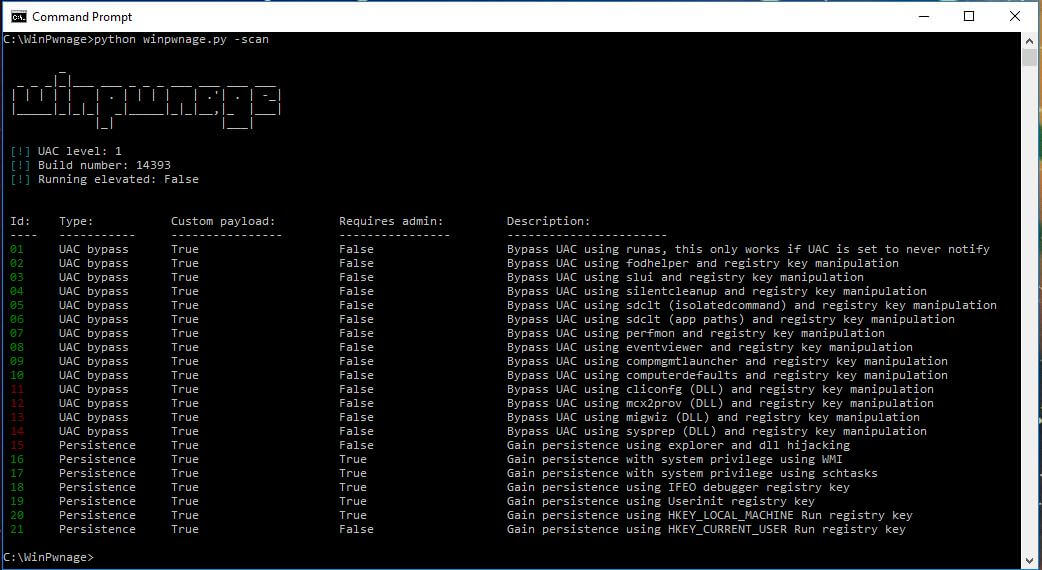
Techniques Implemented In WinPwnage
- UAC bypass using fodhelper
- UAC bypass using computerdefaults
- UAC bypass using slui
- UAC bypass using silentcleanup
- UAC bypass using compmgmtlauncher
- UAC bypass using sdclt (isolatedcommand)
- UAC bypass using sdclt (App Paths)
- UAC bypass using perfmon
- UAC bypass using eventviewer
- UAC bypass using sysprep (dll payload supported)
- UAC bypass using migwiz (dll payload supported)
- UAC bypass using mcx2prov (dll payload supported)
- UAC bypass using cliconfg (dll payload supported)
- Persistence using userinit
- Persistence using image file execution option
- Persistence using hklm run
- Persistence using hkcu run
- Persistence using schtask (SYSTEM privileges)
- Persistence using explorer dll hijack
- Persistence using WMI (SYSTEM privileges)
Also Read Nemesis – A Command Line Network Packet Crafting & Injecting Utility
Installing Dependencies
pip install -r requirements.txt
Build
In order for a successful build, install the py2exe module and use the provided build.py script to compile all the scripts in to a portable executable. On Windows 10, Access Denied errors can accrue while compiling, rerun until success or elevate the prompt.
Screenshot
