


Mobile Security Framework or MobSF is an automated, all-in-one mobile application (Android/iOS/Windows) pen-testing framework capable of performing static, dynamic and malware analysis. It can be used for effective and fast security analysis of Android, iOS and Windows mobile applications and support both binaries (APK, IPA & APPX ) and zipped source code. It can do dynamic application testing at runtime for Android apps and has Web API fuzzing capabilities powered by CapFuzz.
Static Analyzer Docker Image
Automated prebuilt docker image of MobSF Static Analyzer is available from DockerHub
docker pull opensecurity/mobile-security-framework-mobsf
docker run -it -p 8000:8000 opensecurity/mobile-security-framework-mobsf:latest
Also ReadHeadless Burp – Automate security tests using Burp Suite
Requirements
Static Analysis
- Python 3.6+
- Oracle JDK 1.7 or above
- Mac OS Users must install Command-line tools
- iOS IPA Analysis works only on Mac and Linux.
- Windows App Static analysis requires a Windows Host or Windows VM for Mac and Linux.
NOTE:
- On Linux and Mac, install Oracle Java 1.7 or above and make it the default one.
- On Linux, make sure you have 32 bit execution support enabled.
Dynamic Analysis
- If you are going to use MobSF x86 Android VM, it requires Oracle VirtualBox – VirtualBox Download.
- If you are going to use MobSF Android AVD (ARM Emulator), It requires Android Studio and a configured AVD.
- Hardware Requirements: Min 4GB RAM, 5GB HDD/SSD and Virtualization Support for running MobSF VM and Intel HAXM if you are running MobSF ARM Emulator.
Installation
Tested on Windows (7, 8, 8.1, 10), Kali (2016.2), Ubuntu (14.04, 16.04) , OSX (Mavericks, Yosemite, El Capitan), OS (Sierra, High Sierra)
Configuring Static Analyzer
git clone https://github.com/MobSF/Mobile-Security-Framework-MobSF.git
cd Mobile-Security-Framework-MobSF
pip3 install virtualenv
virtualenv -p python3 venv
source venv/bin/activate
pip3 install -r requirements.txt
PDF Report Generation
- You need to install
wkhtmltopdfbinary separately for generating PDF reports. - Check wkhtmltopdf downloads and Installing wkhtmltopdf wiki for more information.
- In Windows, you need to add the folder that contains
wkhtmltopdfbinary to environment variable PATH.
Running
python3 manage.py runserver
If you need to run on a specific port number try python3 manage.py runserver PORT_NO. To expose MobSF to a particular IP, you can try python3 manage.py runserver IP:PORT_NO.
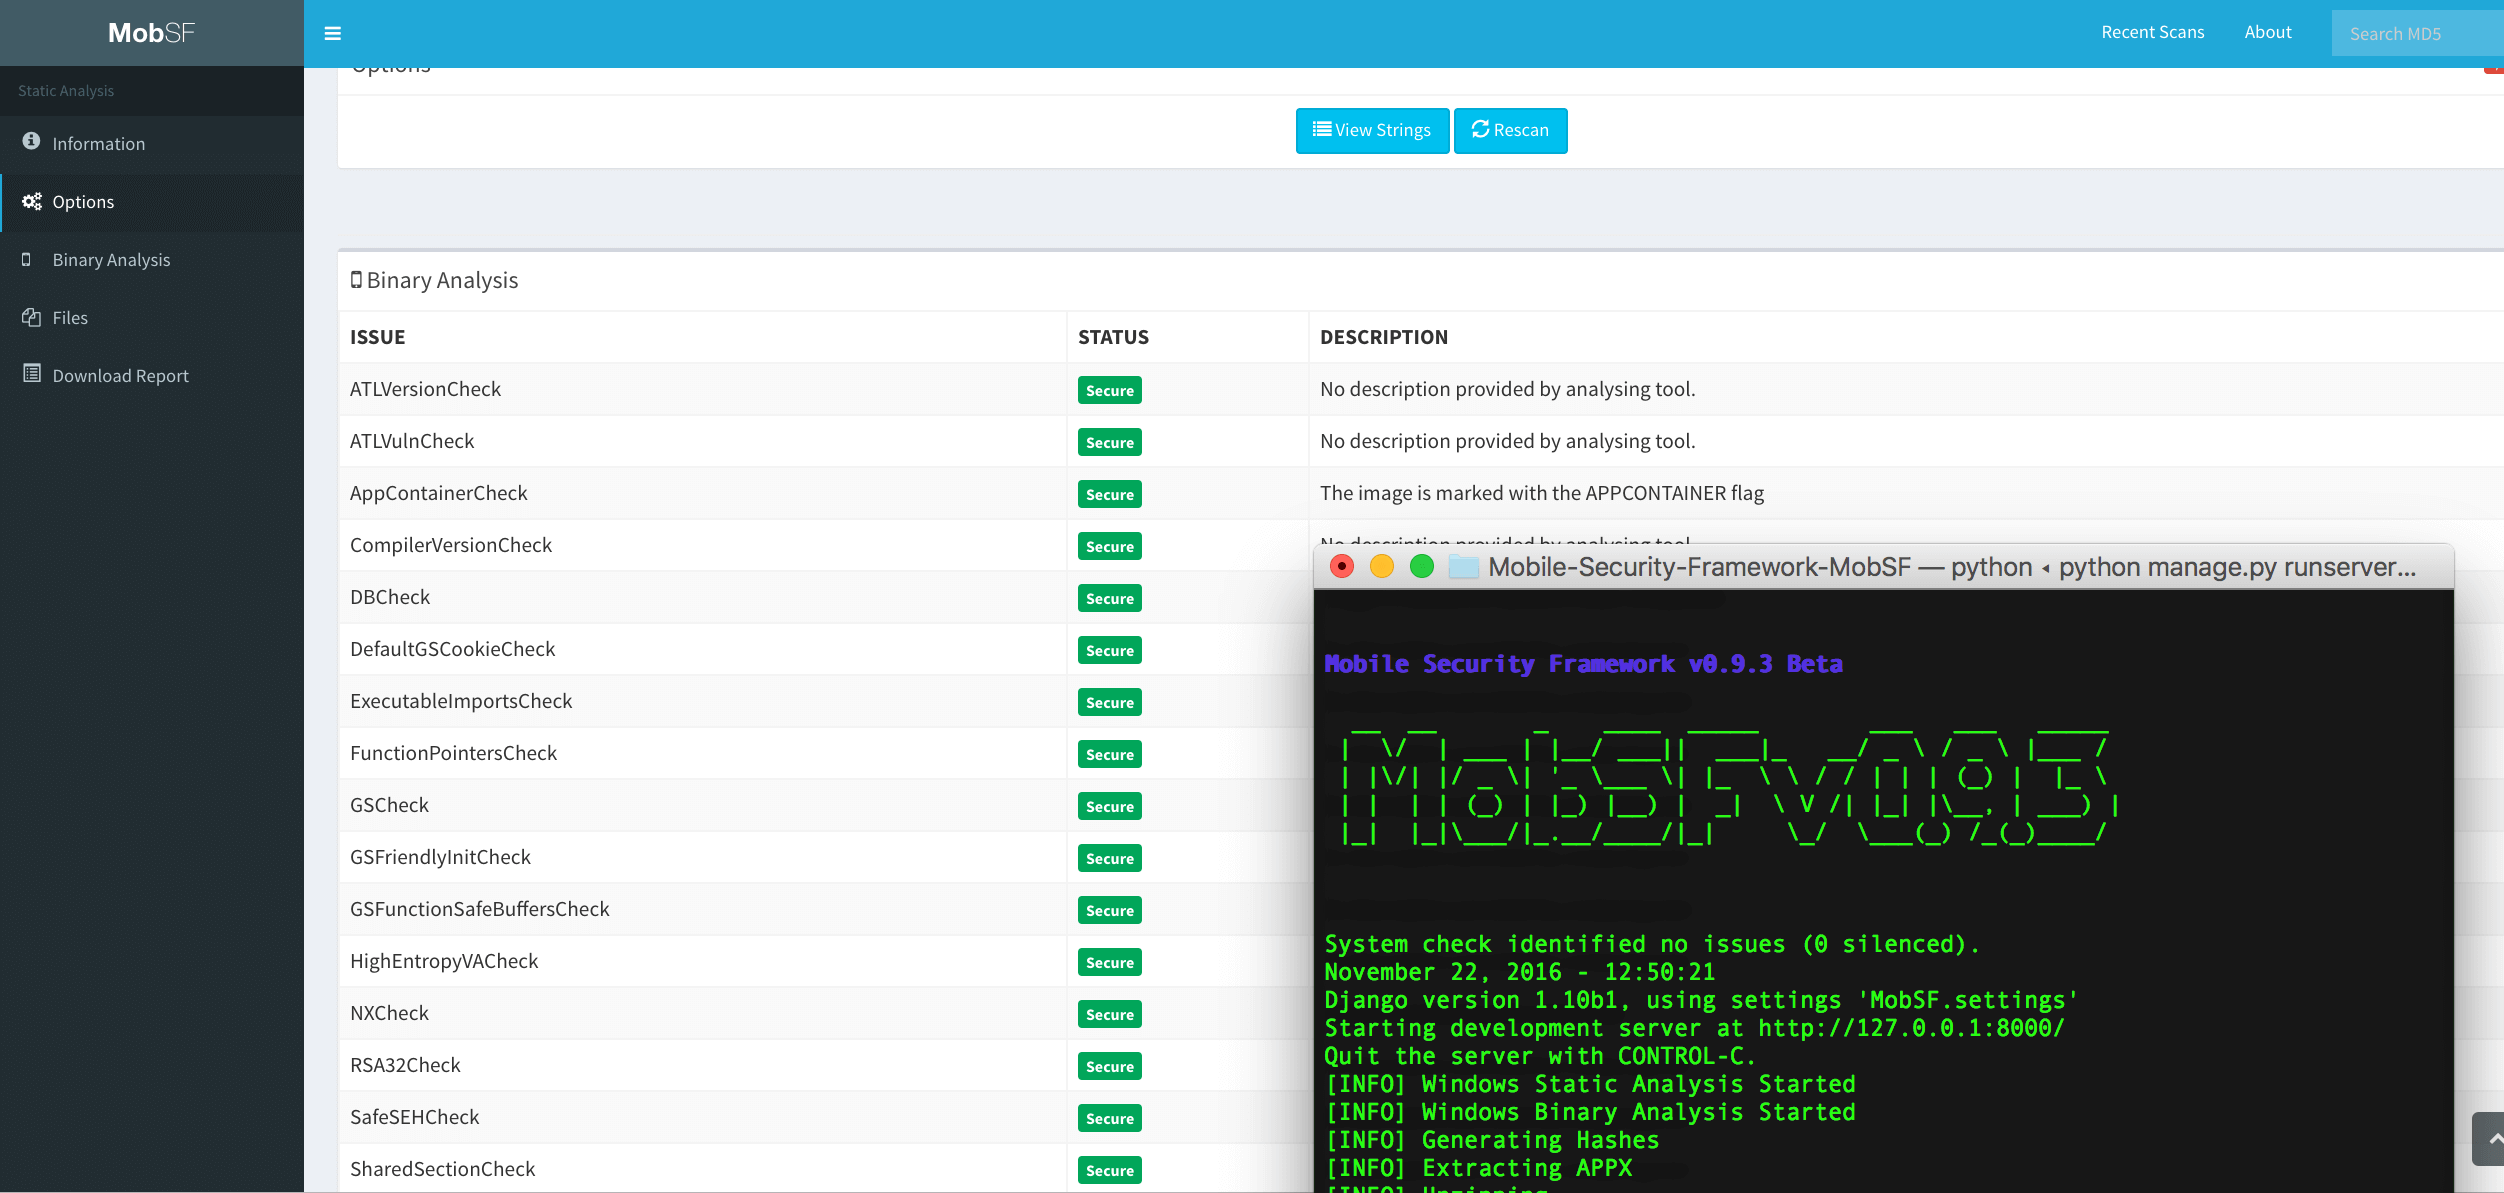
If everything goes right, you will get an output like the one below.
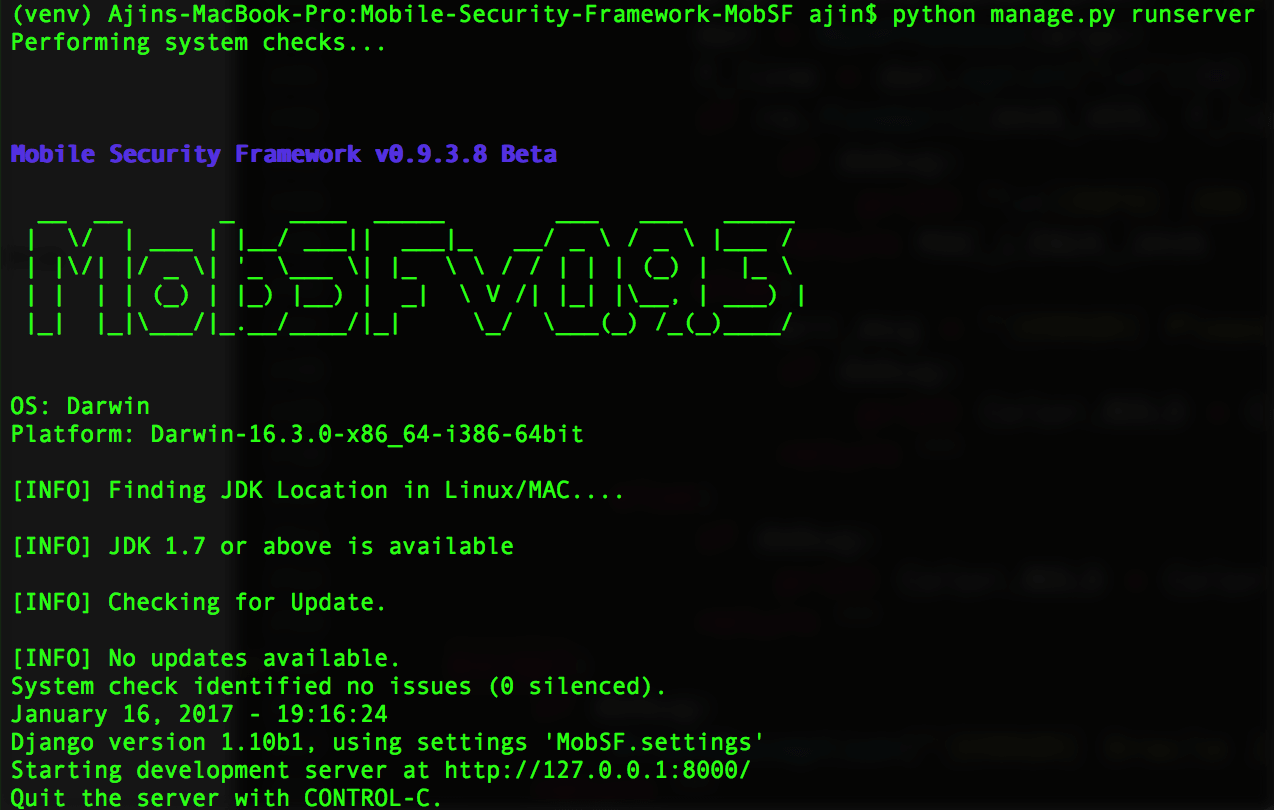
You can navigate to http://localhost:8000/ to access the MobSF Web interface.
Configuring Dynamic Analyzer with MobSF Android 4.4.2 x86 VirtualBox VM
Dynamic Anlayzer is available only for Android binaries (APK) and works only if your computer has at least 4GB of RAM and Full Virtualization support.
NOTE: If you are configuring MobSF VM in VirtualBox for Dynamic Analysis, you must have configured MobSF in the host OS and not inside any VM.
To Configure Dynamic Analyzer we need 4 things.
- VM UUID
- Snapshot UUID
- Host/Proxy IP
- VM/Device IP
Steps to Follow
- Open VirtualBox, Go to File -> Import Appliance and select the MobSF_VM_X.X.ova file.
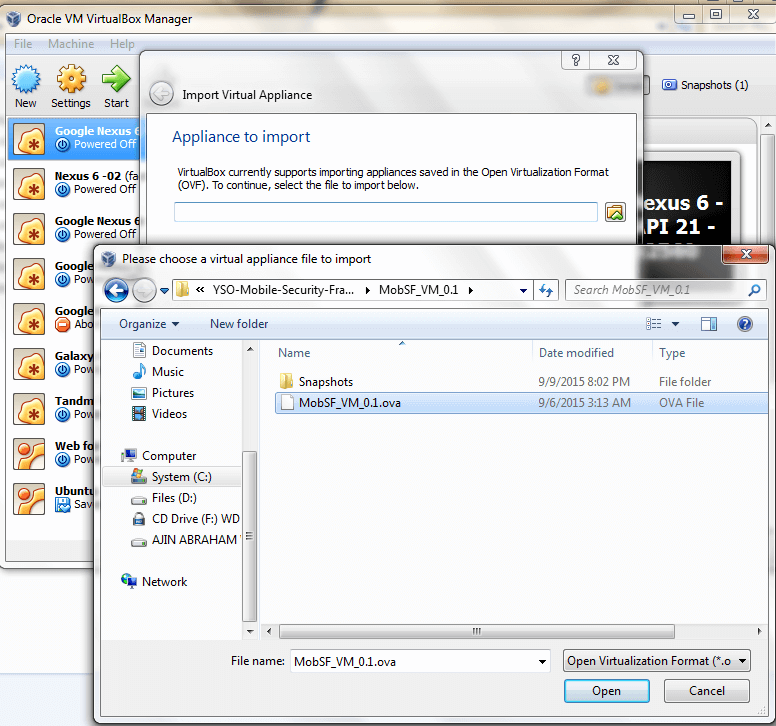
- Proceed with the import process. Do not alter anything.
- Once the OVA is Imported Successfully, you will see a new entry in VirtualBox named MobSF_VM_X.X
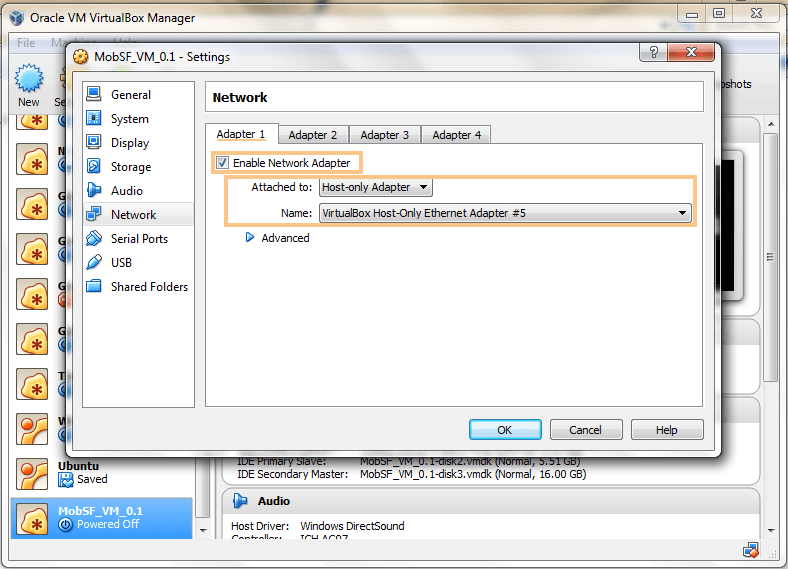
- Right Click MobSF VM and Choose Settings, Go to Network tab. Here we need to configure two Network Adapters.
- Adapter 1 should be enabled and attached to Host-only Adapter. Remember the name of the adapter. We need the name to Identify the Host/Proxy IP.
-
- Adapter 2 should be enabled and attached to NAT

- Save the settings and Start MobSF VM. While the VM is Booting up. Note down the VM IP.
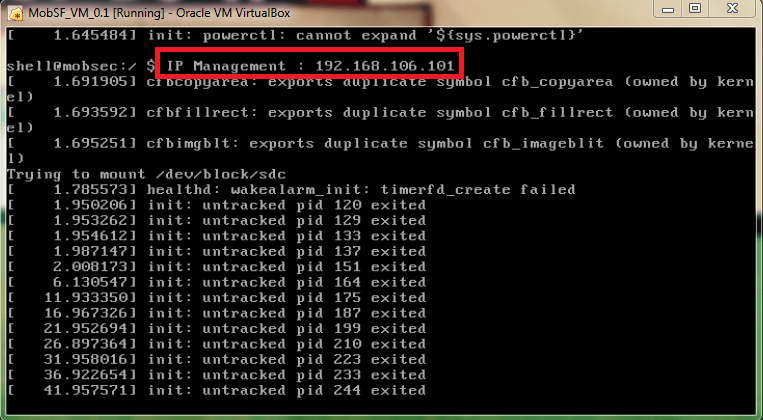
- Once the VM Boots up, It will present a Lock Screen. The password for the Lock Screen is
1234.
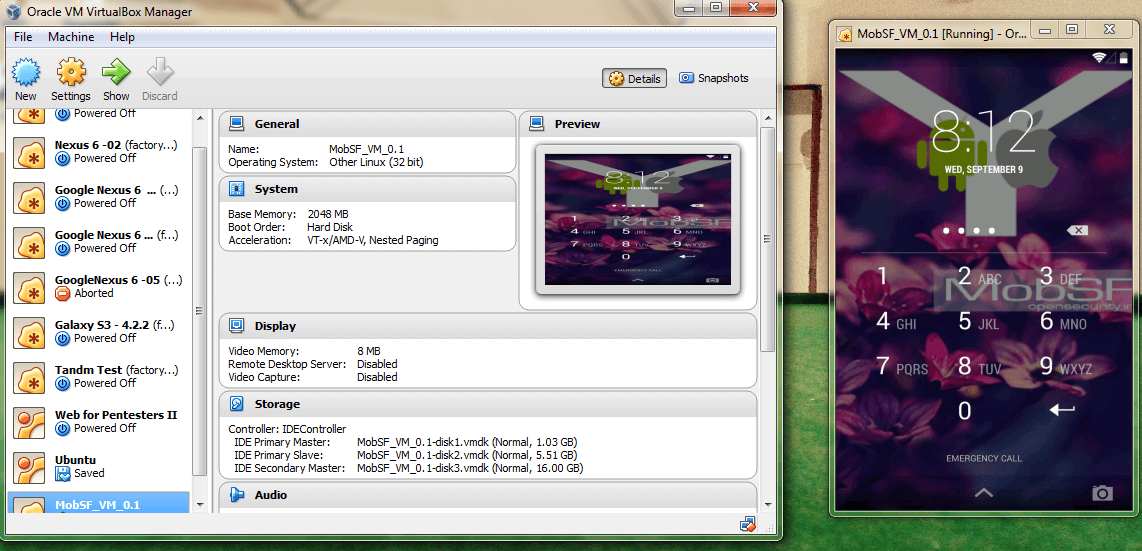
NOTE: If the VM does not boot up properly then you cannot perform Dynamic Analysis with MobSF VM.
- Getting the Host/Proxy IP
- Windows : Issue the command
ipconfigin command prompt and note down the IP corresponding to the name of the Host-only Adapter.
- Windows : Issue the command

-
- Unix : Issue the command
ifconfigin terminal and note down the IP corresponding to the name of the Host-only Adapter.
- Unix : Issue the command

NOTE: The VirtualBox Host-Only Adapter IP and MobSF VM IP should be in the same network range. If your MobSF VM IP and Adapter IP are in different network range, modify the Adapter IP to be in the same network range as that of MobSF VM IP.
- Go to Wi-Fi Settings in MobSF VM and set the Proxy IP as the Host/Proxy IP which you have obtained from the previous step and port no as
1337.

- Save the settings and Navigate to the Home Screen of MobSF VM. Wait for 30 seconds and save a snapshot of the MobSF VM in VirtualBox
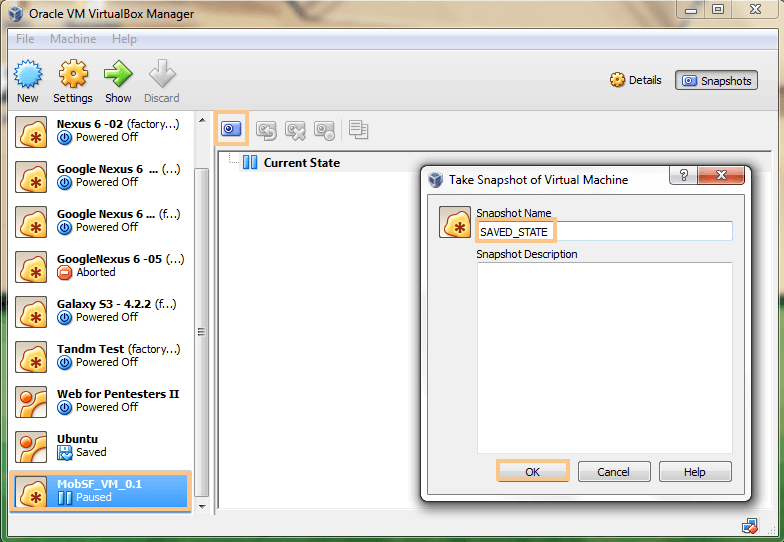
- Once the Snapshot is saved, right click MobSF VM and select
Show in ExplorerorShow in Finder.
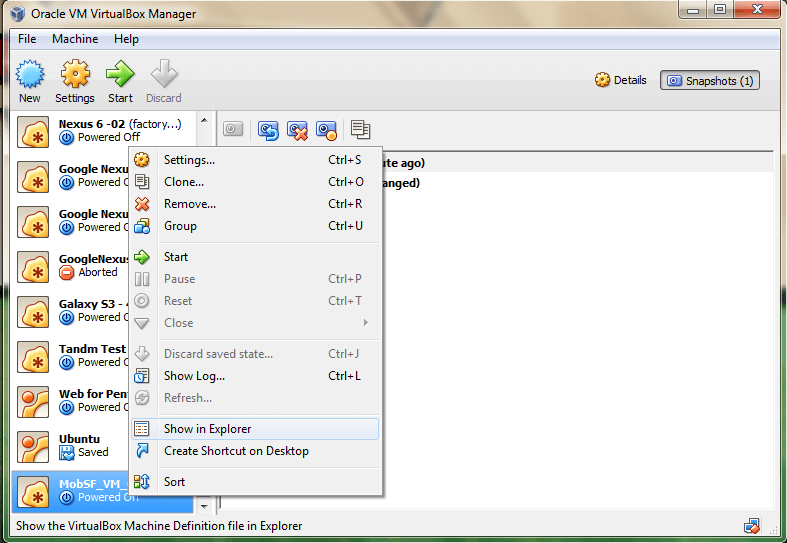
- Open the File MobSF_VM_X.X.vbox in any Text Editor and note down the VM UUID and Snapshot UUID.

Here the value of uuid is the VM UUID and currentSnapshot is the Snapshot UUID.
- Now we have all the things needed to configure the Dynamic Analyzer (Host/Proxy IP, VM IP, VM UUID and Snapshot UUID)
- Go to
MobSF/settings.pyand set the appropriate values as- UUID = VM UUID
- SUUID = Snapshot UUID
- VM_IP = VM IP
- PROXY_IP = Host/Proxy IP
- In
MobSF/settings.py, setANDROID_DYNAMIC_ANALYZER = "MobSF_VM"(default) - This will configure MobSF to use Android VirtualBox VM for Dynamic Analysis.
Configuring Dynamic Analyzer with with MobSF Android 4.1.2 arm Emulator
- Make sure Android Studio is installed and an AVD is created. (Nexus 5 with Lollipop image is recommended)
- Extract MobSF_ARM_Emulator.zip
- Run
scripts/mobsfy_AVD.pyscript and specify the directory that contains the files extracted fromMobSF_ARM_Emulator.zip. - In
MobSF/settings.py, setANDROID_DYNAMIC_ANALYZER = "MobSF_AVD" - This will configure MobSF to use Android arm Emulator for Dynamic Analysis.
Manual Configuration (not recommended)
- If
mobsfy_AVD.pyscript is not running successfully, you need to set the values forAVD_EMULATORandAVD_PATHinMobSF/settings.pymanually. - Follow the README inside the emulator zip and change all the path fields according to your system
- edit
MobSF/settings.pyand modify
AVD_EMULATOR = r'/Users/[USERNAME]/Library/Android/sdk/tools/emulator'
# This can be /Users/[USERNAME]/Library/Android/Sdk/emulator/emulator for newer versions of android SDK

AVD_PATH = r'/Users/[USERNAME]/.android/avd'
 # Path to the avd folder where you extracted the emulator
- In
MobSF/settings.py, setANDROID_DYNAMIC_ANALYZER = "MobSF_AVD"
Configuring Dynamic Analyzer with Rooted Android 4.03 – 4.4 Device
- MobSFy the Rooted Android Device, Follow the instructions here: Configure MobSF Dynamic Analysis Environment in Android Device
- In
MobSF/settings.py, setANDROID_DYNAMIC_ANALYZER = "MobSF_REAL_DEVICE" - Set
DEVICE_IPandDEVICE_ADB_PORTwith the IP and PORT that you got from WiFi ADB
Configuring Dynamic Analyzer with Rooted Android 4.03 – 4.4 VM
- MobSFy the Custom VM, Follow the instructions here: Configure MobSF Dynamic Analysis Environment in Custom VM
- VM on Virtual Box: If the VM is hosted on VirtualBox, follow the same steps that you have followed for configuring MobSF x86 VirtualBox VM and set appropriate
VM UUID,Snapshot UUID,Host/Proxy IP,VM IPand setANDROID_DYNAMIC_ANALYZER = "MobSF_VM" - Any Other VM: Configure it as a Real device. Set
ANDROID_DYNAMIC_ANALYZER = "MobSF_REAL_DEVICE"and specifyDEVICE_IPandDEVICE_ADB_PORT. Snapshot feature is only available with VM(s) hosted in VirtualBox.
Updating MobSF
If you are updating MobSF, In most cases you might have to perform database migrations or you will see errors such as
[ERROR] Saving to DB (E:\Mobile-Security-Framework-MobSF\StaticAnalyzer\views\android\db_interaction.py, LINE 236 "static_db.save()"): table StaticAnalyzer_staticanalyzerandroid has no column named
Run the below command to migrate your db
python3 manage.py makemigrations
python3 manage.py migrate
If the above changes didn’t work, you might have to run clean.sh(present in scripts) in Mac/Linux. After that run the above commands.
NOTE: This will remove the previously saved scan results.
Disabled Components
Some components are disabled by default as they are experimental
APKiD
APKiD is disabled by default. Before enabling you will have to install the rednaga fork of yara-python.
git clone --recursive https://github.com/rednaga/yara-python-1 yara-python
cd yara-python
python3 setup.py build --enable-dex install
Enable APKiD in settings.py by setting APKID_ENABLED to True.
Running Tests
- Basic Static Analyzer unit tests – run MobSF and navigate to
http://127.0.0.1:8000/runtest/ - MobSF REST API unit tests – run MobSF and navigate to
http://127.0.0.1:8000/runapitest/
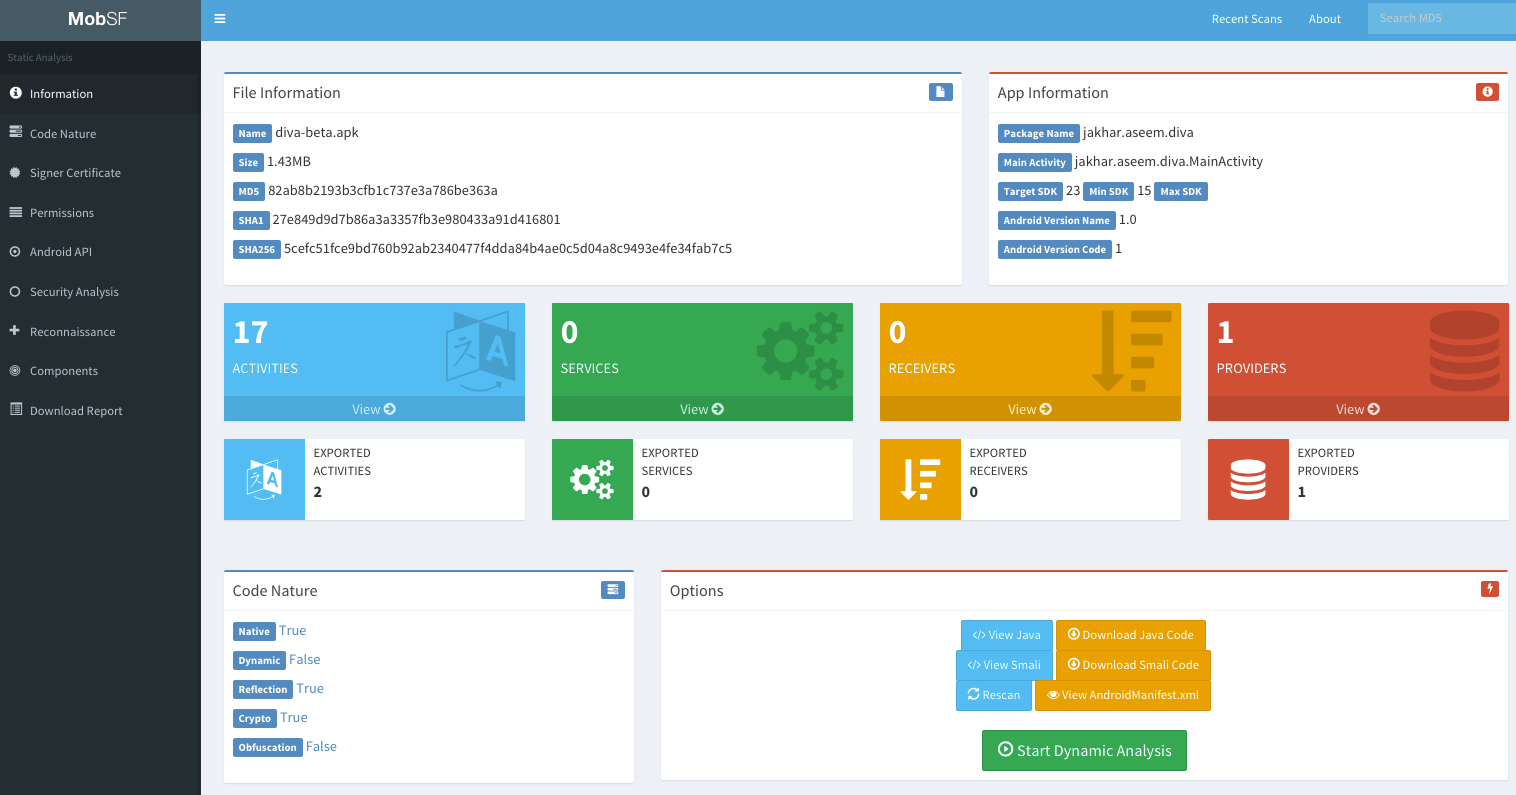
Screenshots
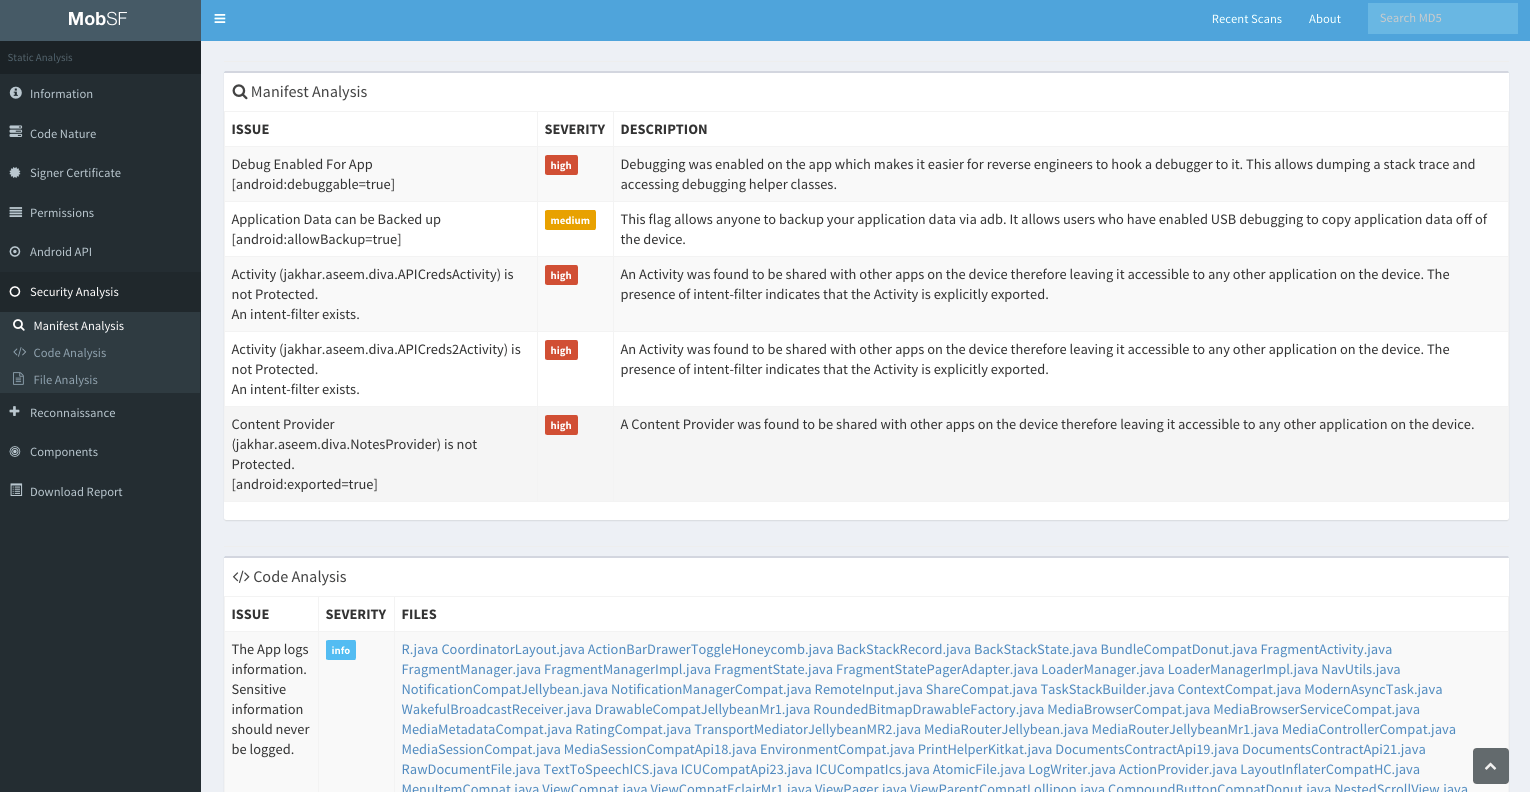
Static Analysis – Android APK
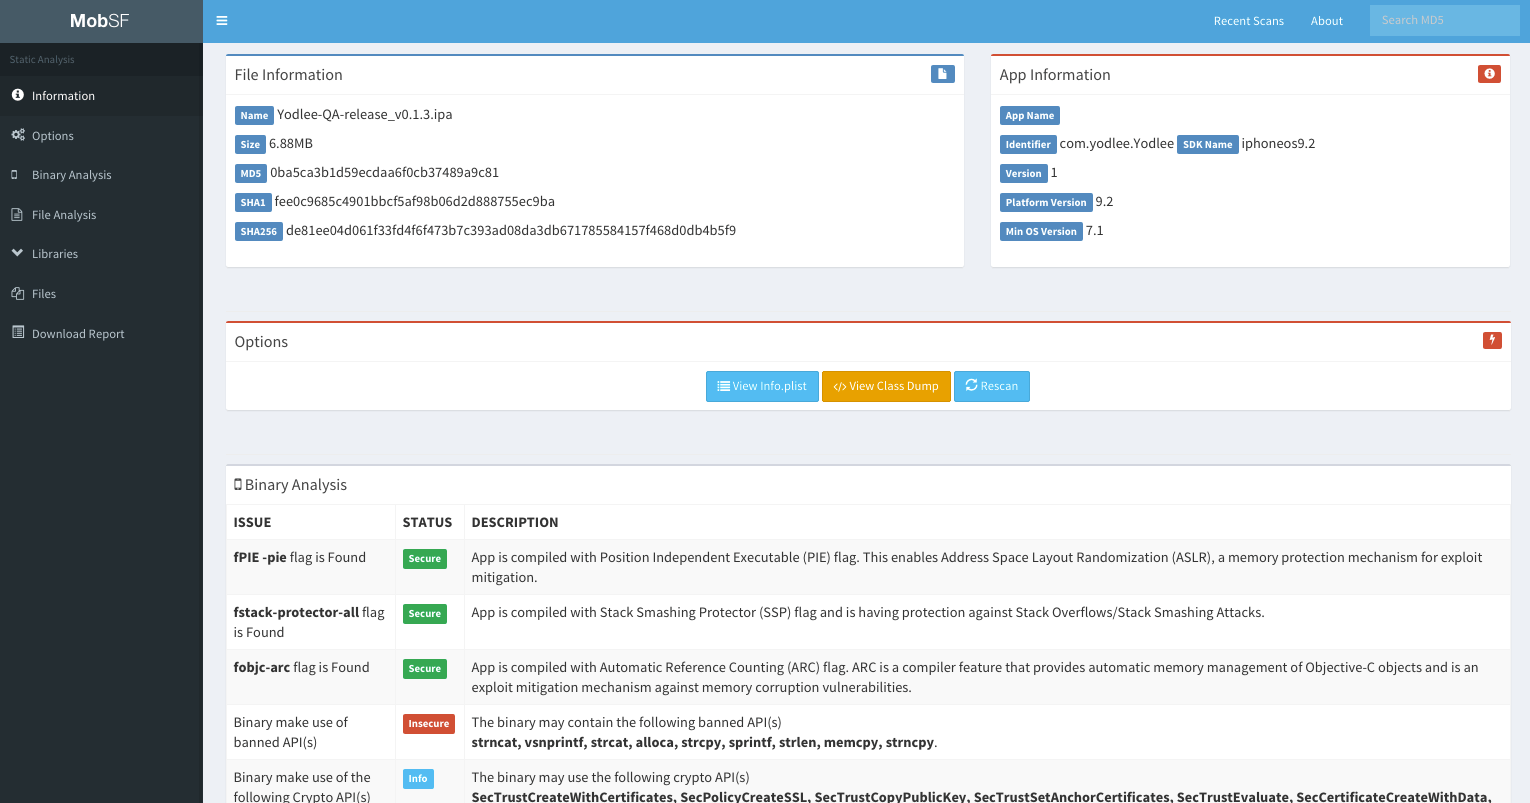
Static Analysis – iOS IPA
Static Analysis – Windows APPX
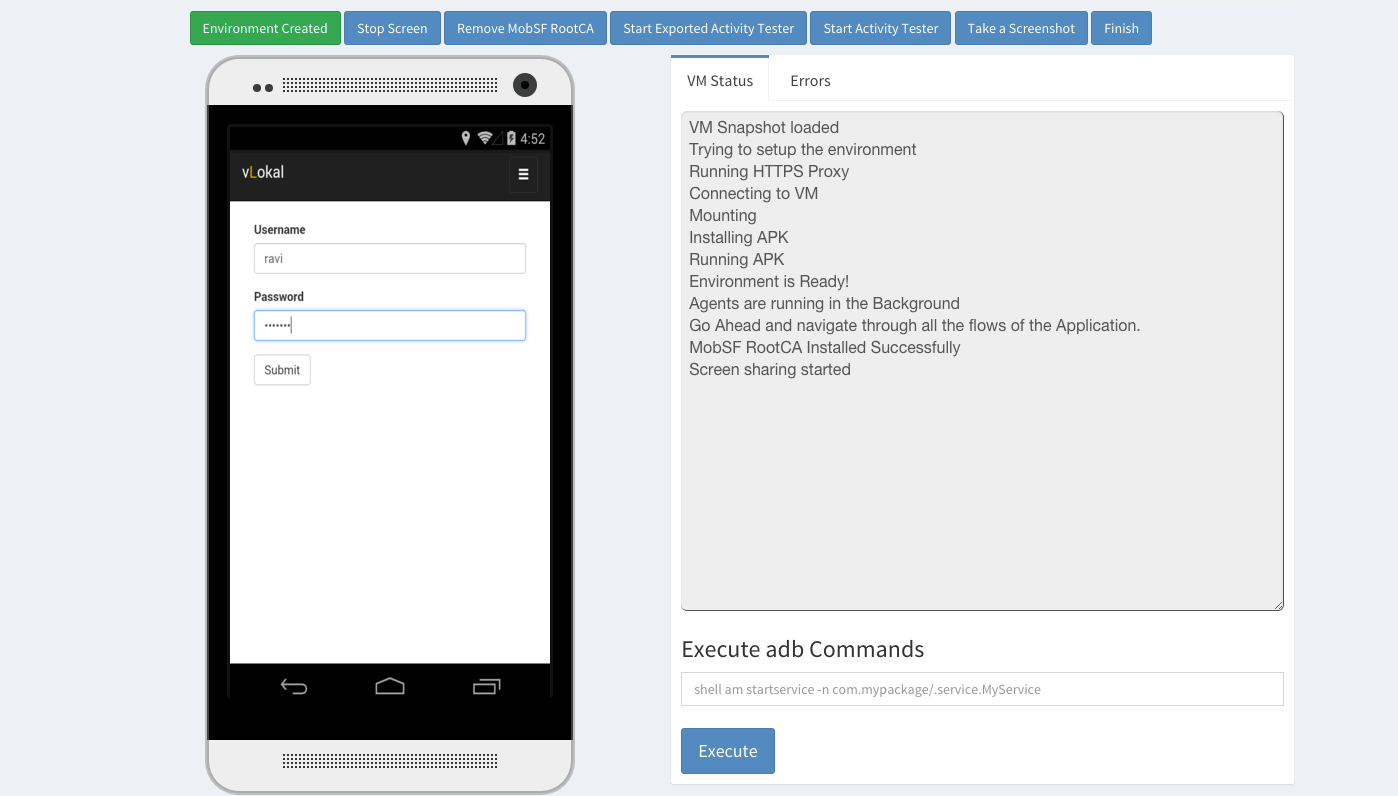
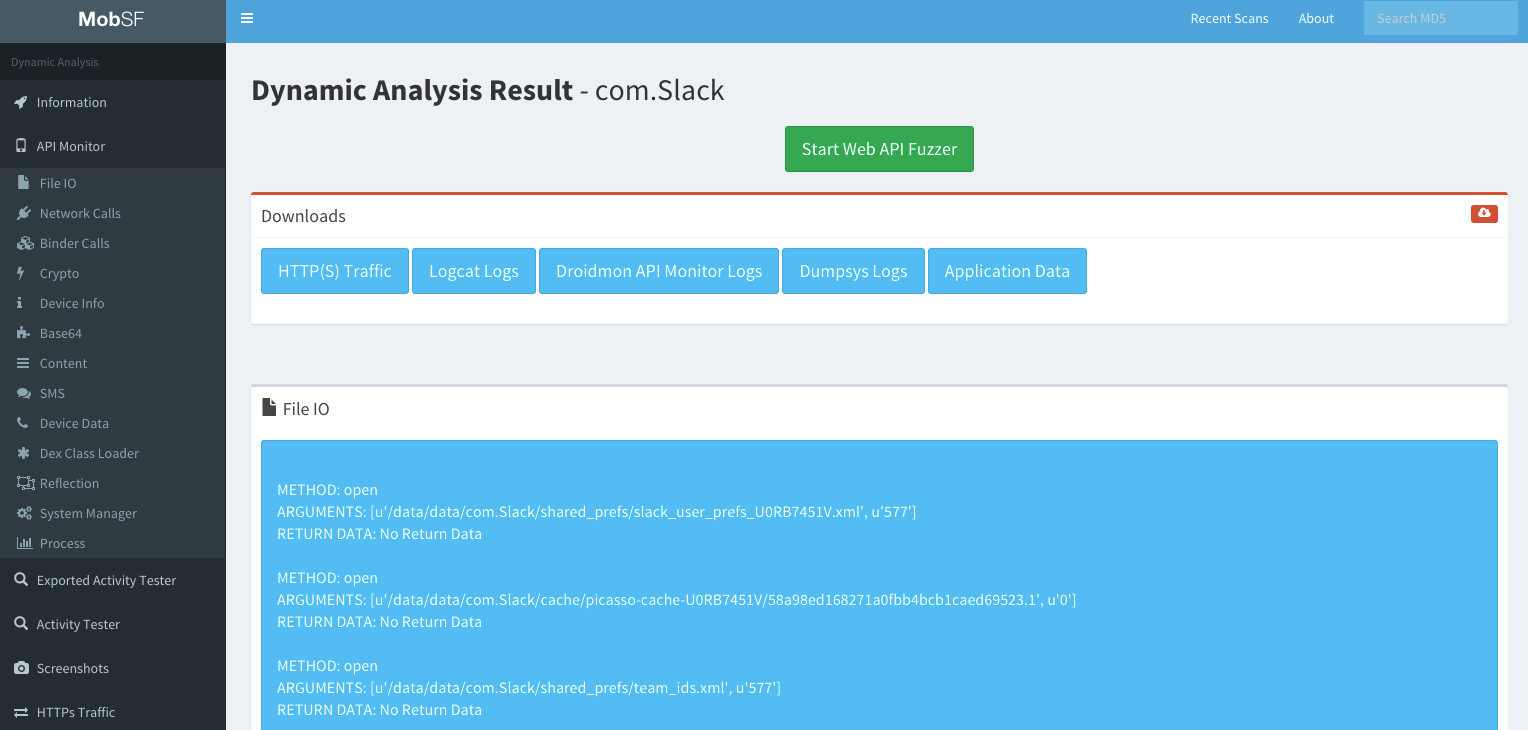
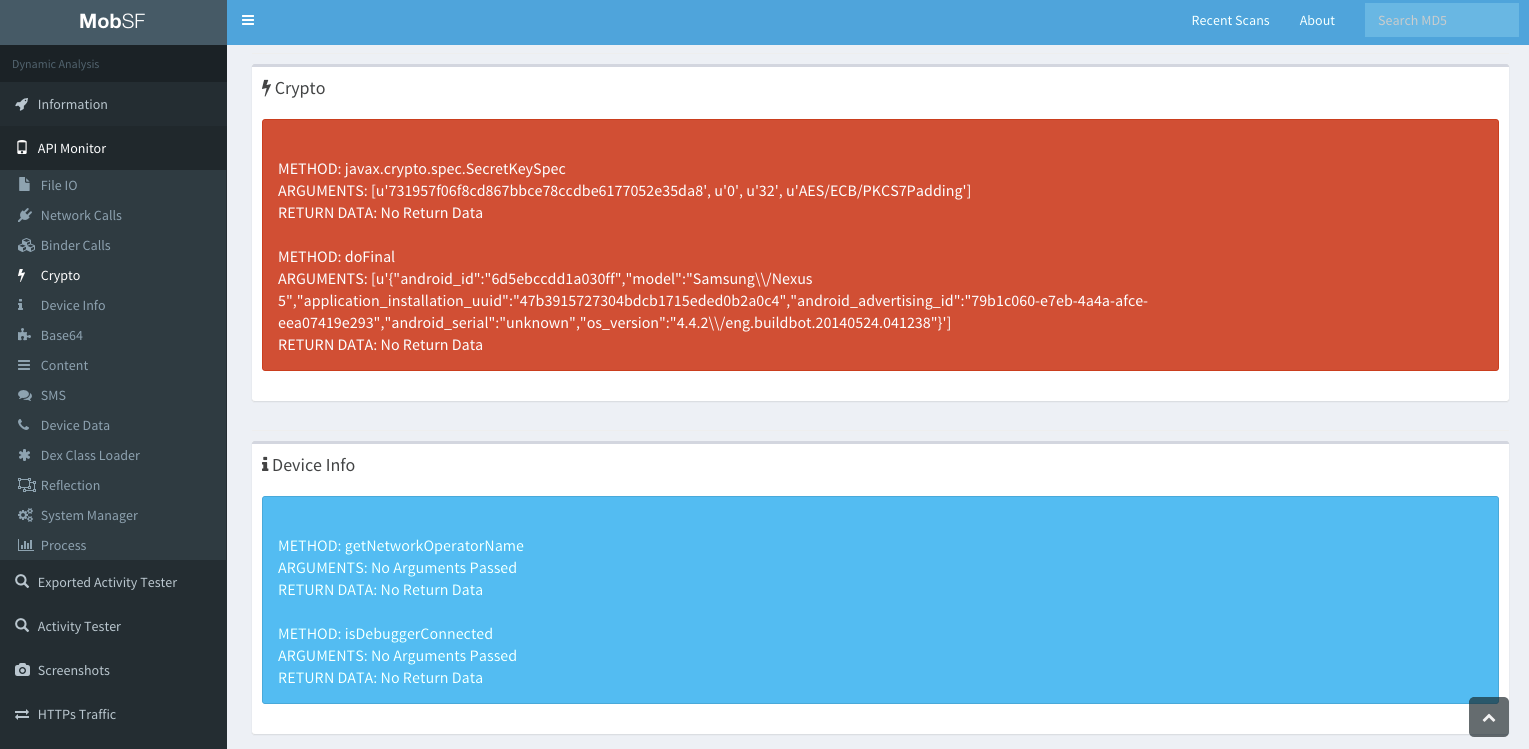
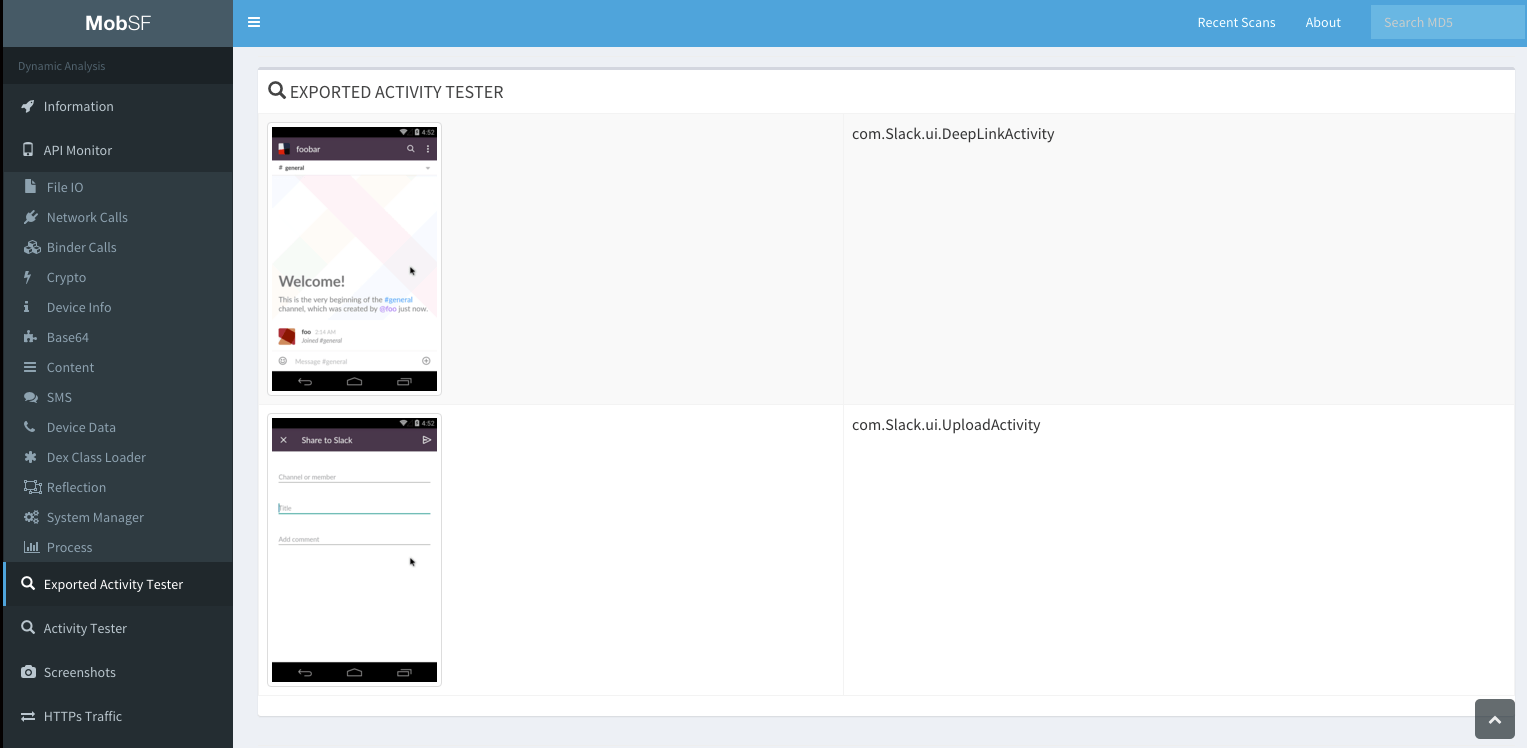
Dynamic Analysis – Android APK
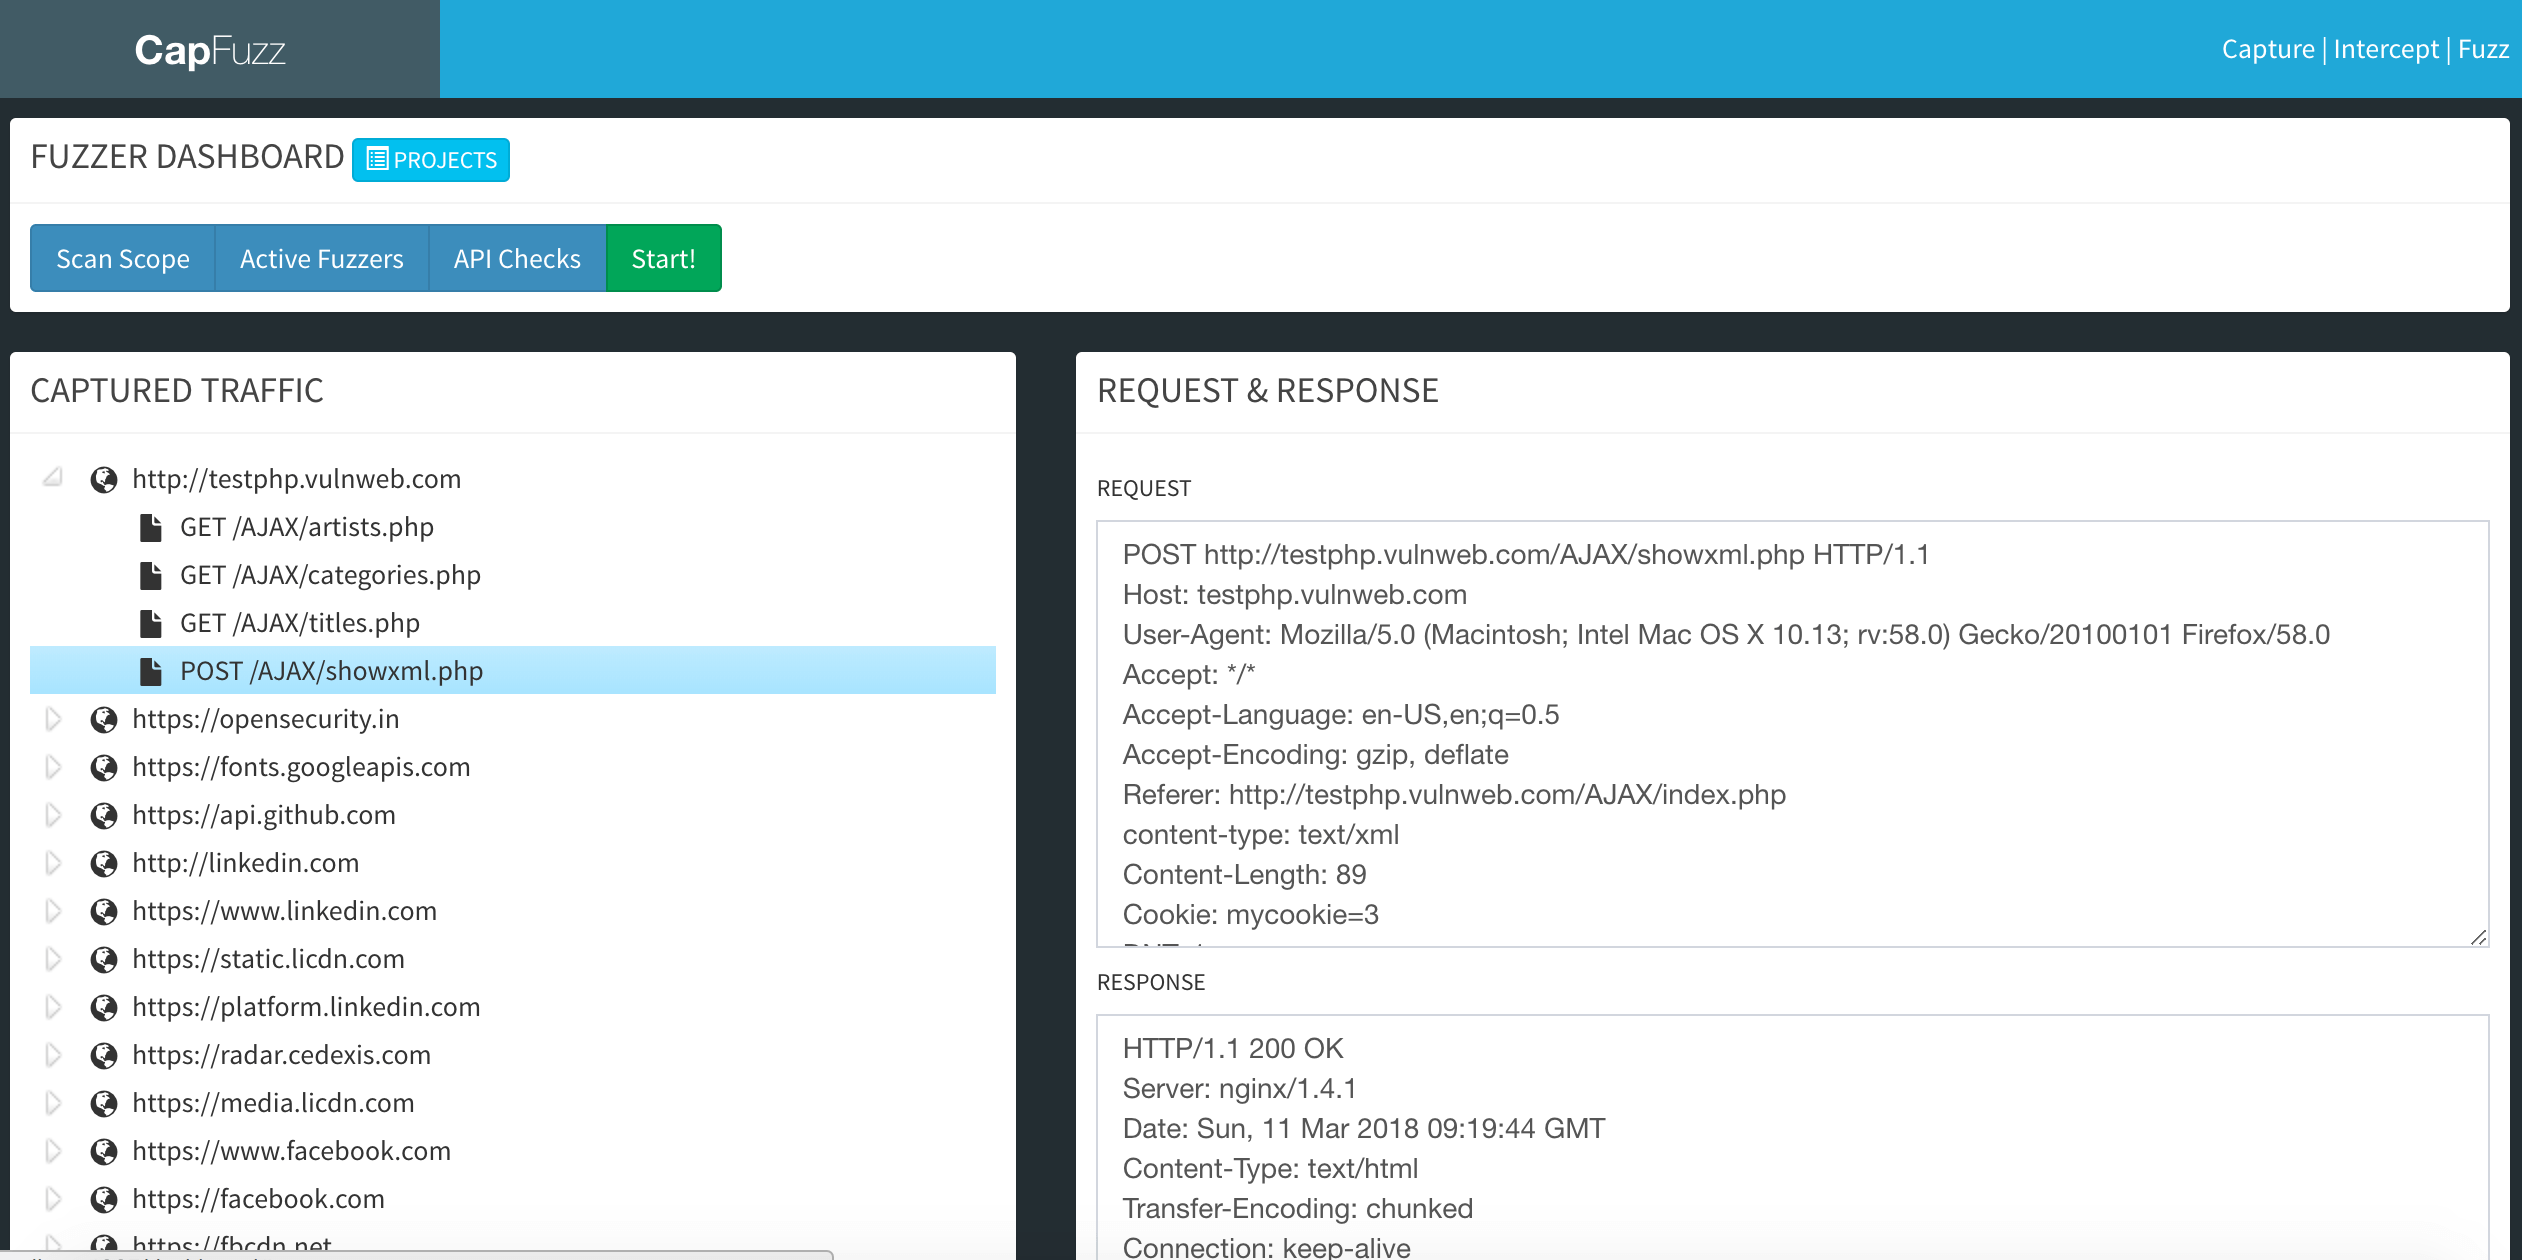
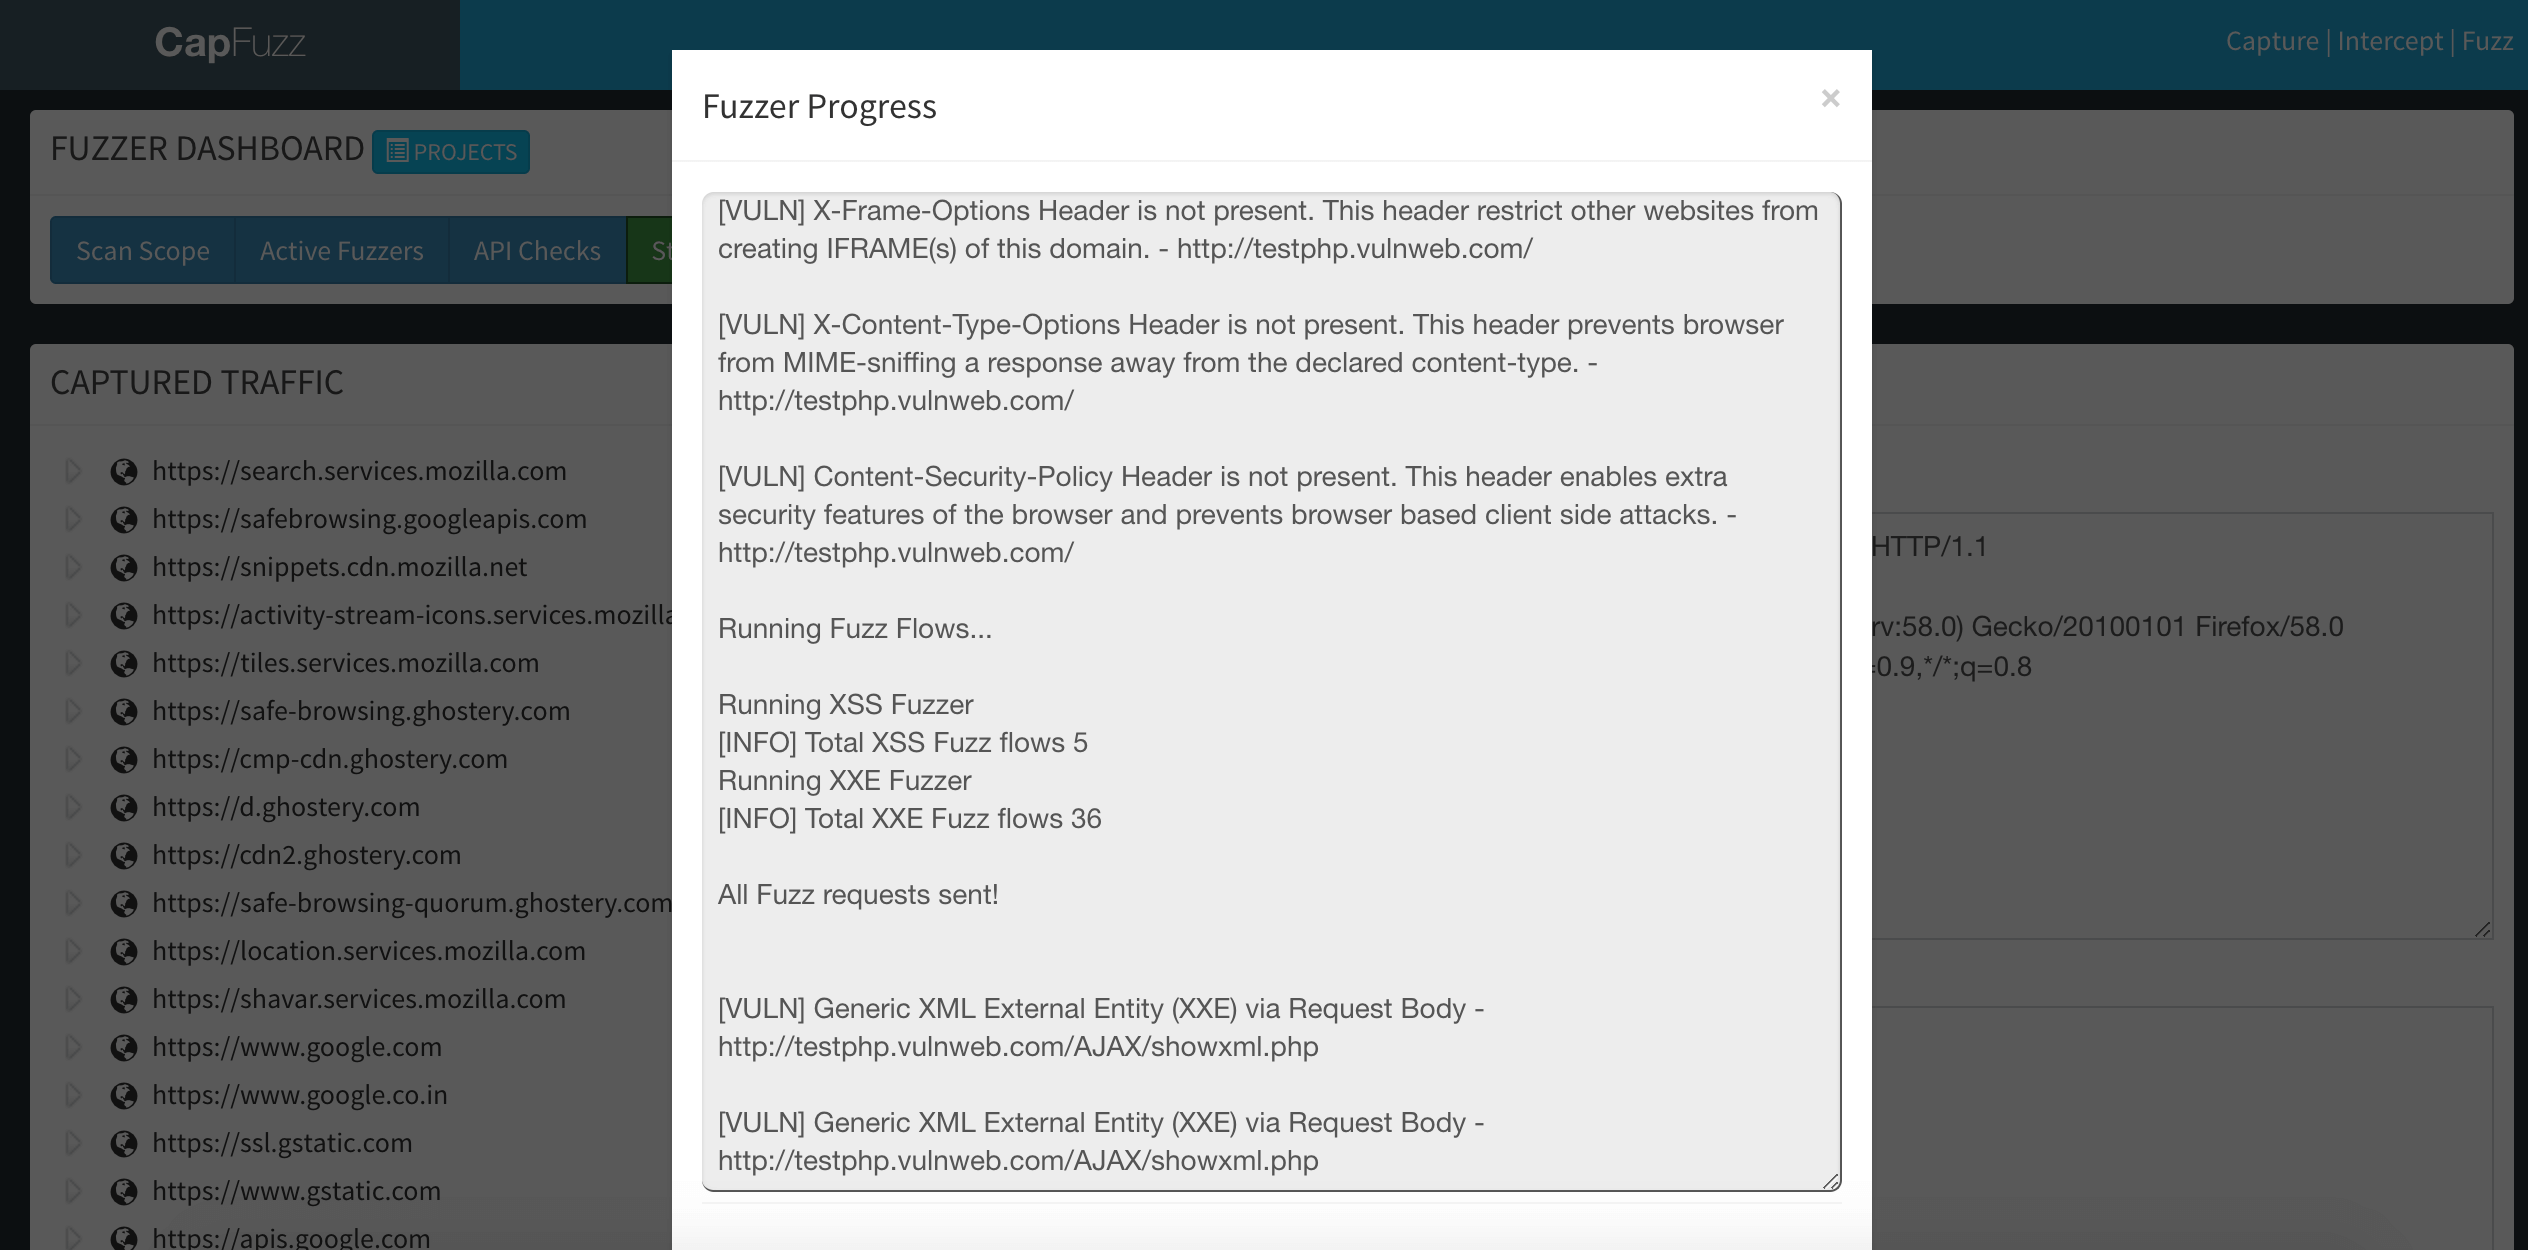
Web API Fuzzer
Video Presentation
![]()


")


