


Xori is an automation-ready disassembly and static analysis library that consumes shellcode or PE binaries and provides triage analysis data.
Architectures:
- i386
- x86-64
- PE, PE+
- Plain shellcode
- Outputs json of the 1) Disassembly, 2) Functions, and 3) Imports.
- Manages Image and Stack memory.
- 2 modes:
- Light Emulation – meant to enumerate all paths (Registers, Stack, Some Instructions).
- Full Emulation – only follows the code’s path (Slow performance).
- Simulated TEB & PEB structures.
- Evaluates functions based on DLL exports.
- Displays strings based on referenced memory locations.
- Uses FLIRT style signatures (Fast Library Identification and Recognition Technology).
- Allows you to use your own exports for simulating the PEB.
- Will detect padding after a non-returning call.
- Will try to identify function references from offsets.
What it doesn’t do yet:
- The engine is interactive.
- Does not dump strings.
- Does not process non-executable sections.
- TEB and PEB are not enabled for non-pe files.
- Only some x86 instructions are emulated, not all.
- Patching and assembling.
- No plugins or scripting.
Also Read – BoNeSi – The DDoS Botnet Simulator
Install rust for OSX & Linux Distros
curl https://sh.rustup.rs -sSf | sh
Install rust for Windows
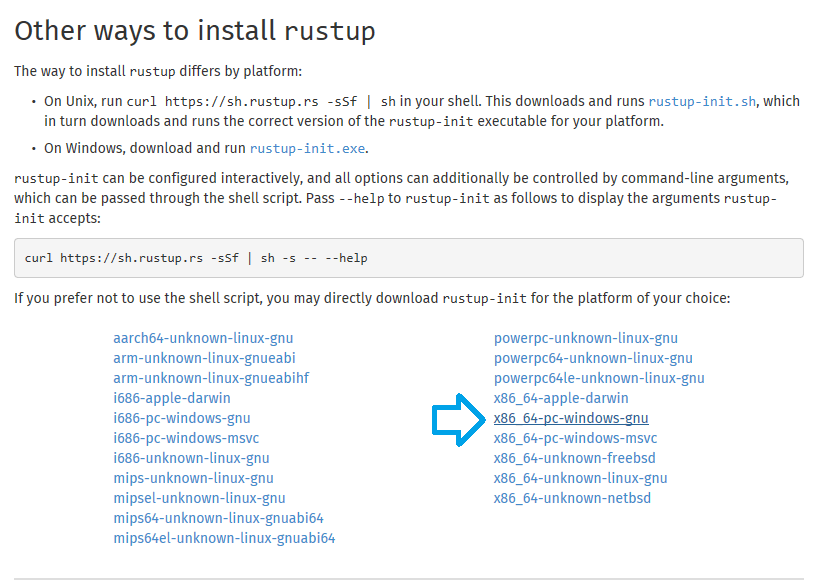
First get the rustup.exe (the rust toolchain installer) from here.
This tool will install the rust compiler rustc, the rust package manager cargo and other usefull tools for development in rust.
- run the rustup.exe
in case you see this output, your Windows environment is missing the Build Tools for Visual Studio so keep reading, otherwise go here
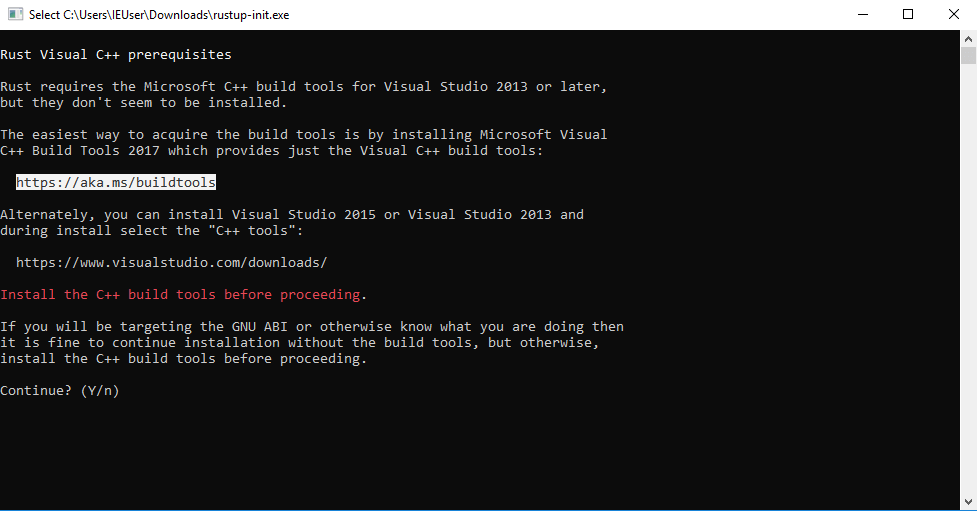
- follow the link from the output, or click here
- cancel the rustup-init.exe
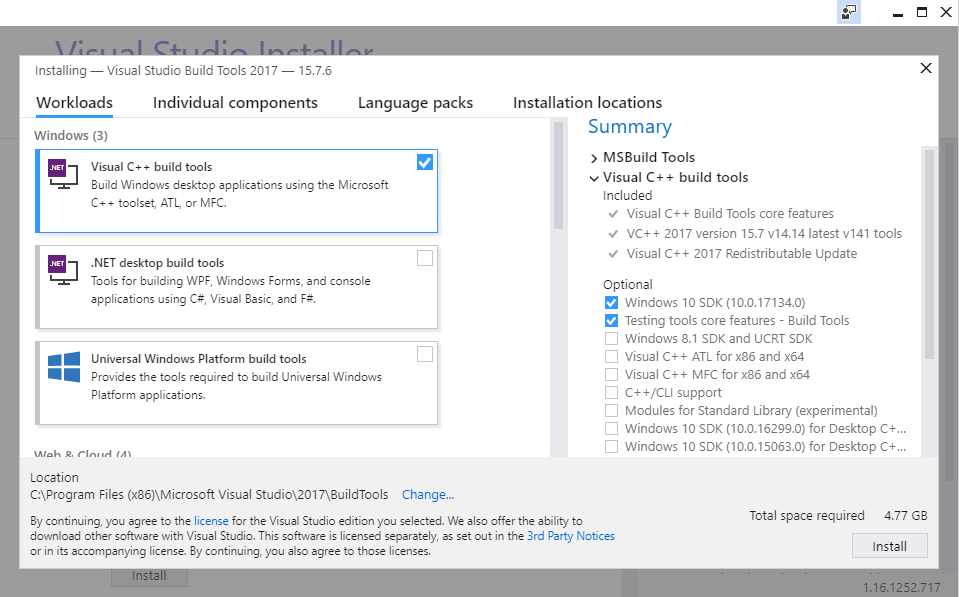
- back in browser, scroll down, expand the tab Tools for Visual Studio 2017 & download the Build Tools for Visual Studio 2017

- run the executable
choose the Visual C++ build tools & click “install”, close the “Visual Studio Installer” after the installation
Install rust toolchain
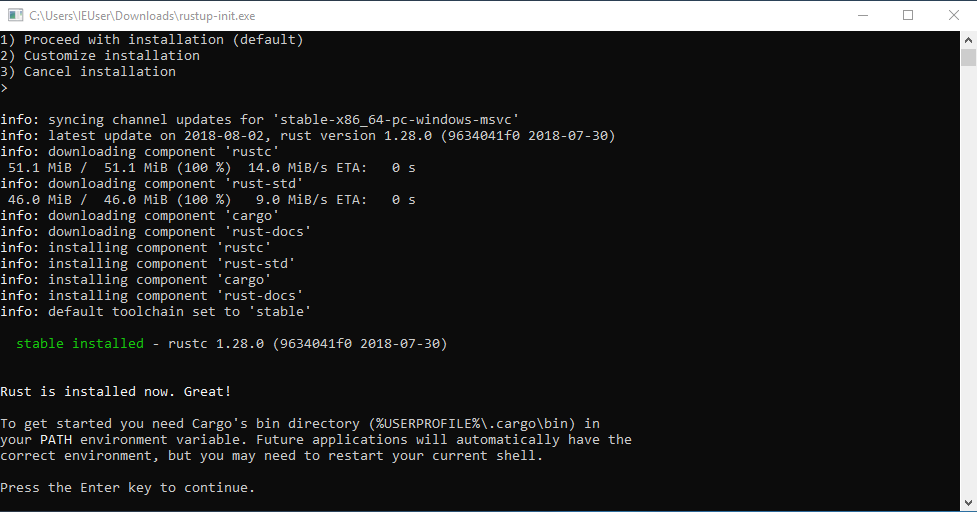
run the rustup.exe & you will see the following output
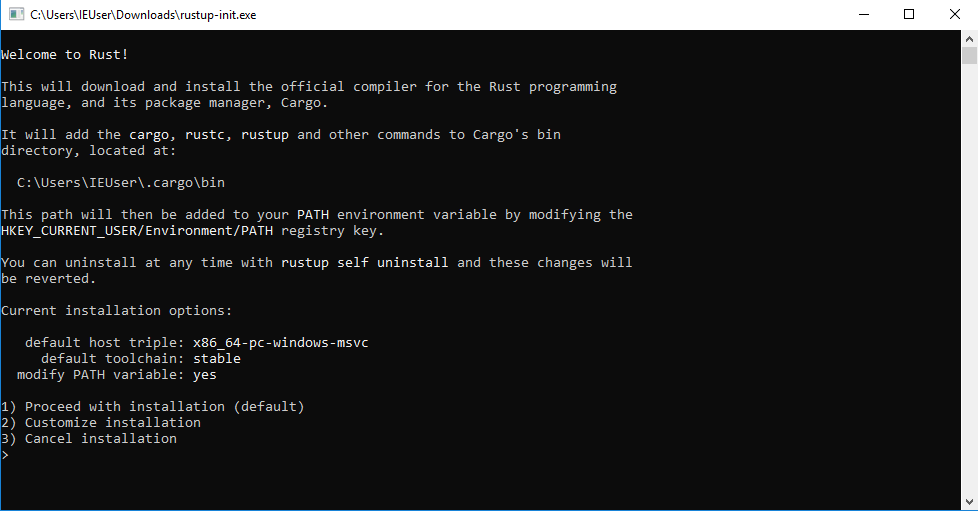
fter the successful installation you can see that the rust compiler rustc, rust package manager cargo and other tools were installed (under C:\Users\%username%\.cargo & C:\Users\%username%\.rustup)
- open a new “Command Prompt” & follow the xori build steps here
Installation
Build Xori
This command will also create other binaries such as pesymbols ans peinfo.
git clone https://github.com/endgameinc/xori.git
cd xori
cargo build –release
Create xori.json config file
cp xori.json.example xori.json
[edit if desired]
(Optional) Build the symbols files
If you want to create your own symbol files you need to set the dll folders to where you stored your windows dlls.
“function_symbol32”: “./src/analysis/symbols/generated_user_syswow64.json”,
“function_symbol64”: “./src/analysis/symbols/generated_user_system32.json”,
“symbol_server”: {
“dll_folder32”: “./dlls/32bit”,
“dll_folder64”: “./dlls/64bit”
Run pesymbols to overwrite the function_symbol json
./target/release/pesymbols
Run
./target/release/xori -f test.exe
Run all tests
cargo test
Browser GUI
| Chrome | Firefox | Safari | IE | Opera |
|---|---|---|---|---|
| Latest ✔ | Latest ✔ | Latest ✔ | x | Latest ✔ |
Requirements
nodejs
yarn (optional for UI dev)
- On Ubuntu 18.04 you may need to apt install the following: curl git libssl-dev pkg-config build-essential npm
Build
cd gui
npm install
Run
In one terminal
cd gui
node src/server.js
In another terminal
cd gui
npm start
It will open your default browser to http://localhost:3000/. The backend API is listening on localhost:5000.


